Purpose: To add or edit manual journal entries.
Launch Point: This routine can be launched from the following location(s):
•Utilities → Routines → General Ledger Journal Entries →
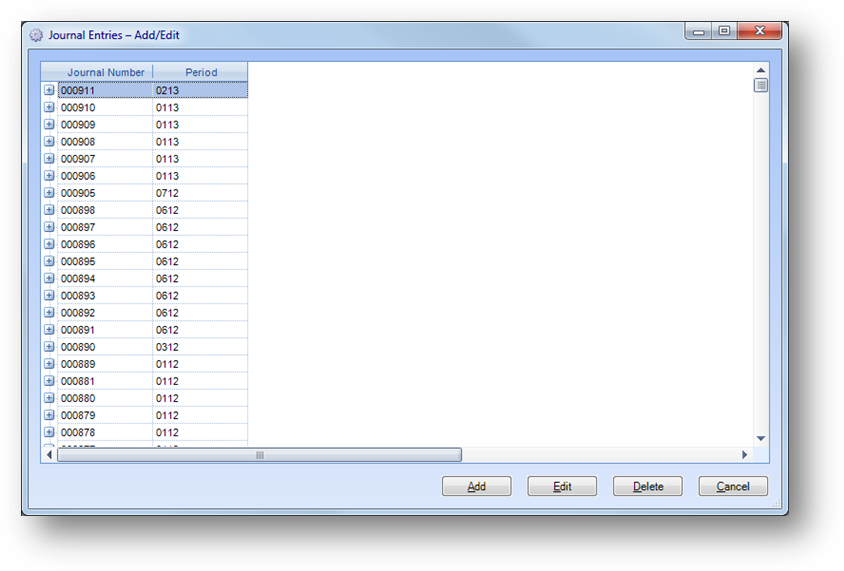
Example: When the routine is launched a window will open
The window that opens will show manual journal entries in the system with the most current period at the top.
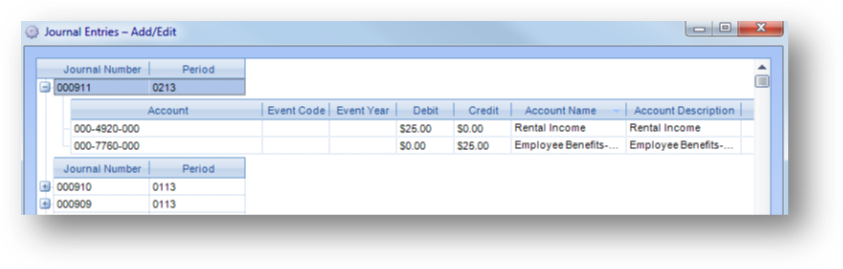
You can view the details of a journal entry by expanding the child row(s).
To delete an existing journal entry, highlight the journal entry in the grid and click the Delete button. The delete button will only be enabled if the row you highlight is from an open accounting period.
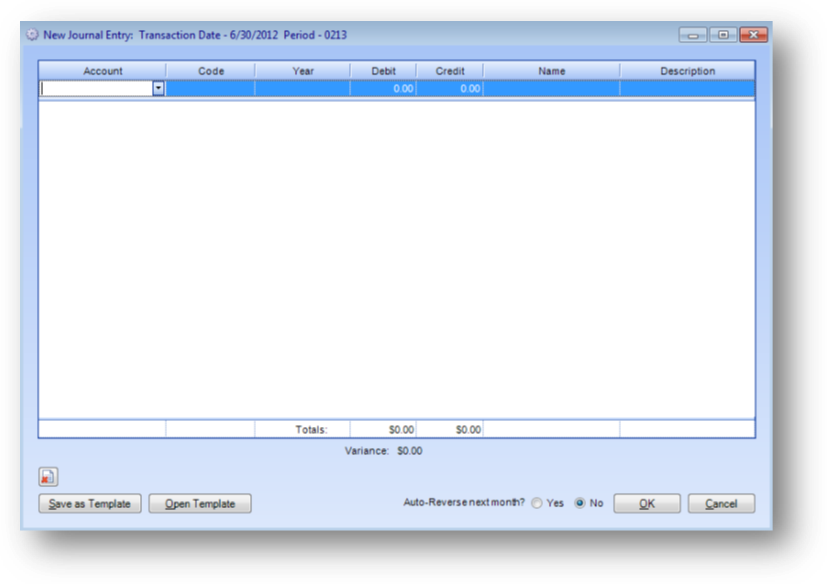
To add a new journal entry, click the Add button. The New Journal Entry window will open.
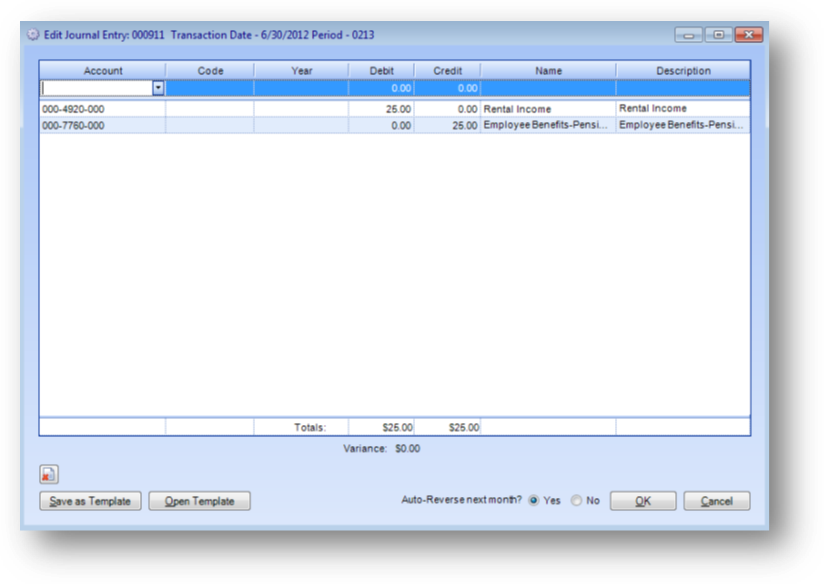
To edit an existing journal entry, highlight the journal entry in the grid and click the Edit button. The edit button will only be enabled if the row you highlight is from an open accounting period.
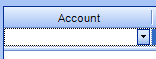
Once in add or edit mode, a new line item can be added to the journal entry either by opening the Account drop-down list and selecting the account from the list, or by entering the account number.
Note: once one line item has been entered, and while the cursor is still in the account field you can use the F3 button to copy the GL account from the last entered line into the new line. When the cursor is in the description field in the new line (top row of the grid), hit Enter to add that row to the journal entry and be placed in the account field of the top row for a new line.
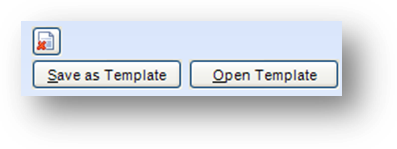
Rows can also be added from a template. When the journal entry window is open, you can save the existing rows in the grid to a template by clicking the Save as Template button. To use a previously saved template, click on the Open Template button.
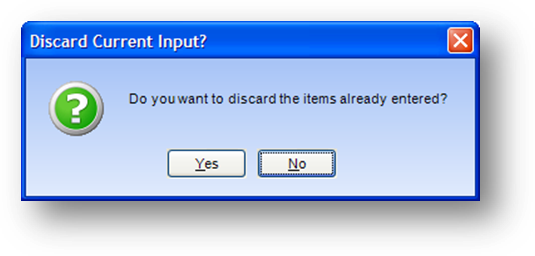
If there are currently rows in the journal entry, you will get a message asking if you want to discard those rows. Click Yes to clear all existing rows and replace with the rows from the template. Click No to keep the existing rows and add the rows from the template.
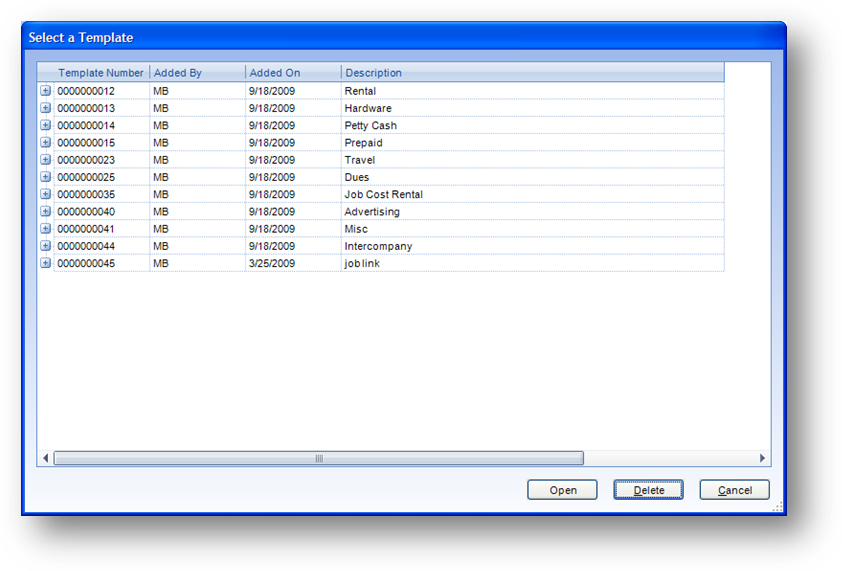
When you click the Open Template button, the Select a Template window will open showing all the templates in the system.
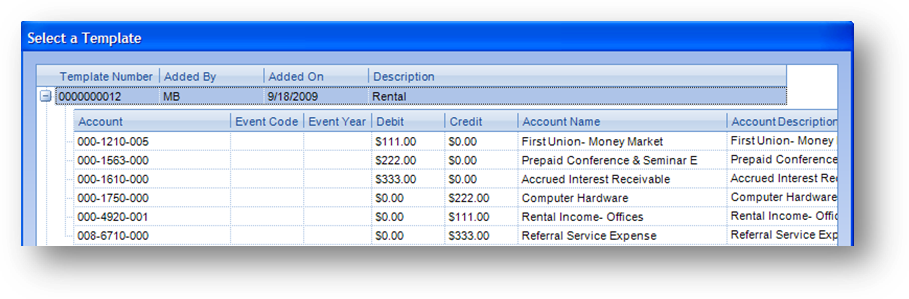
You can click on the plus sign to the left of the parent row to expand the details for the template.
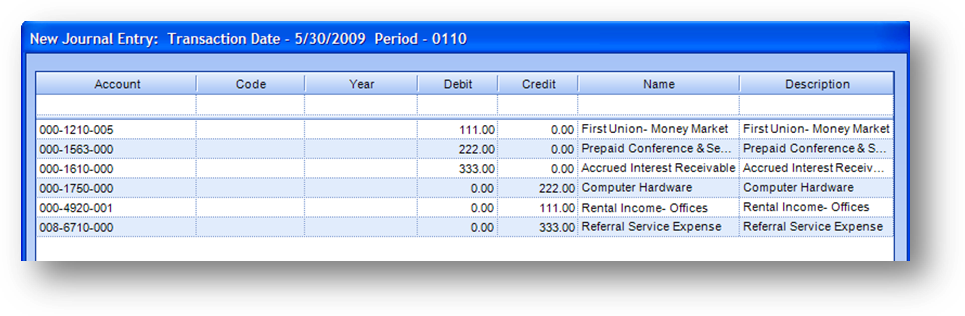
When you open the template the rows will be added to the journal entry. In most cases, changing the Debit/Credit amounts is all that will be required. However, you can also add new rows or edit/delete existing rows.
If you have edited the data and you want to save the current setup to a template, click the Save as Template button.
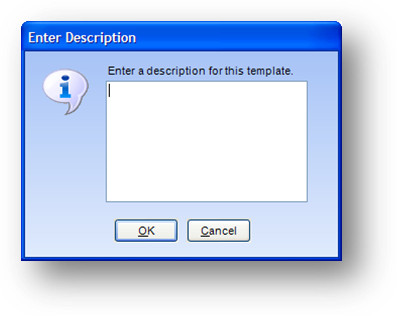
The Enter Description window will open. Enter the description you want saved for this template and click OK.
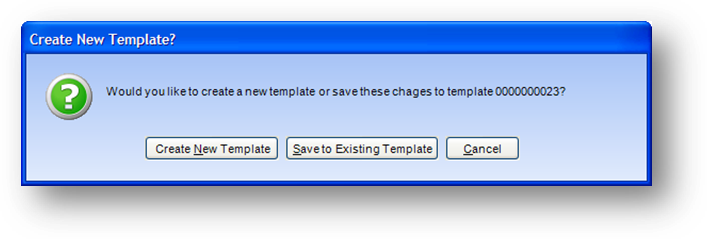
If you had previously opened a template into this journal entry, a Create New Template message will be shown. If you want to overwrite the existing template click Save to Existing Template. To leave the existing template as it is and create a new template from the data in the current journal entry, click Create New Template.
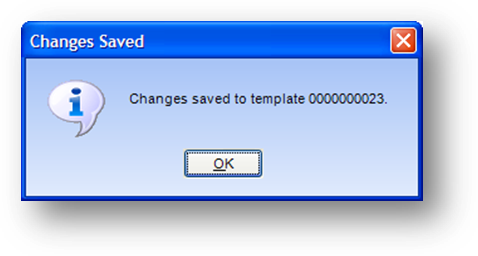
You will then get a message letting you know that the changes have been saved to the template.
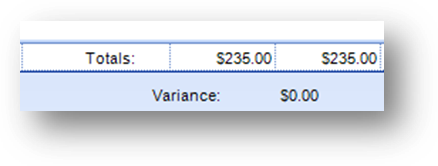
As you enter rows to the grid, a running total is shown at the bottom of the grid for the Debit and Credit columns. The variance between these two columns is also shown below the grid. You can only save a journal entry with a zero variance.

To delete a row in the grid highlight the row and then click the delete button.

If an auto-reversing entry for this journal entry should be entered next month, then select the Yes radio button for Auto-Reverse next month.
When you have finished the entry of the journal entry, click OK.
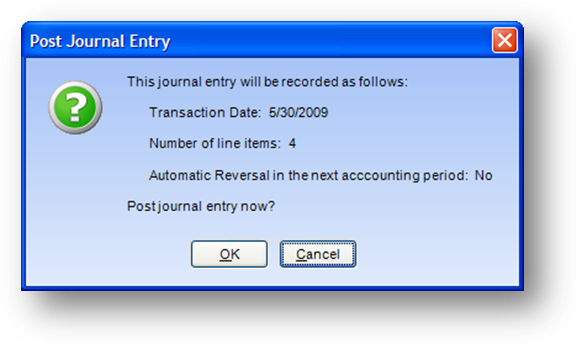
A recap message will be shown. Click OK to post the journal entry.
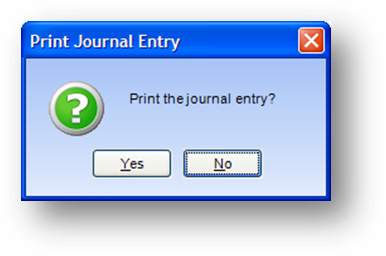
A message will open asking if you want to print the journal entry.
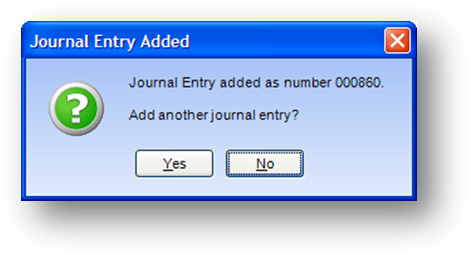
Next you will get a message showing you the journal entry number assigned to the entry just added, and asking if you would like to add another journal entry. If you click Yes, you will be taken back to the New Journal Entry window. If you click No, the routine will be closed.