Purpose: Allows for viewing and clearing email addresses bounced by Mailgun.
Launch Point: This routine can be launched from the following location(s):
•Utilities à Routines à Supervisor Functions à
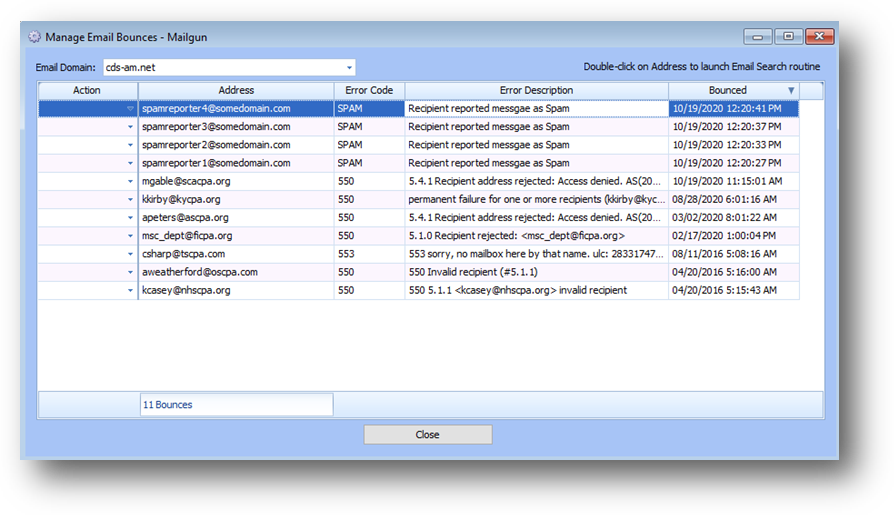
Example: When the routine is launched a window will open
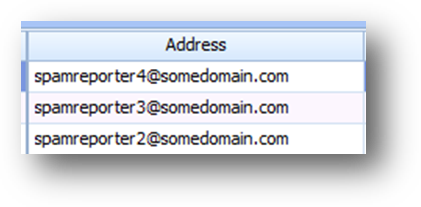
The grid shows email addresses bounced, and not cleared, at Mailgun for the selected Email Domain.

If your association does not have any Mailgun profiles setup in the system, this message is shown and the routine will not launch.
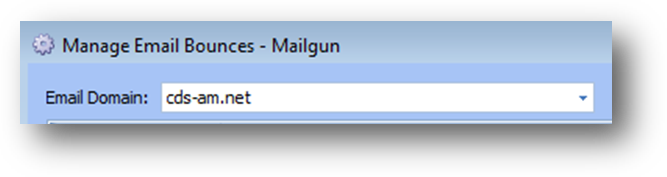
If your association has multiple Mailgun profiles setup in the system, above the grid select the Email Domain to work with. Bounced emails for that email domain will be displayed in the grid.
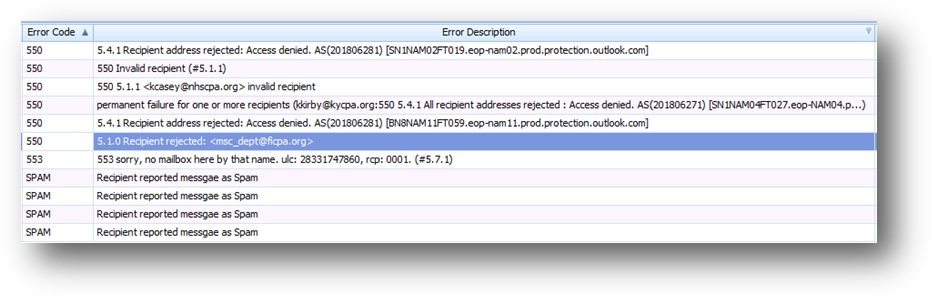
There are various reasons (mailbox doesn’t exist, reported as spam…) an email address is bounced. The Error Code and Error Description shows why the address was bounced.
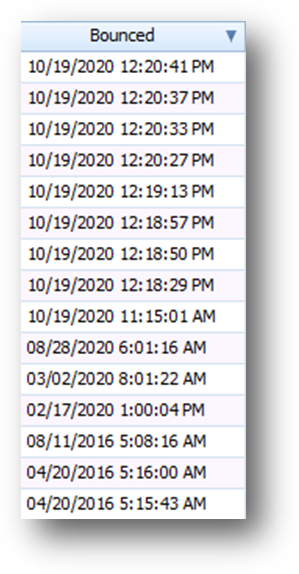
Bounced shows the initial date the email address was bounced. Note: The grid will only show a specific email address one time in the grid.
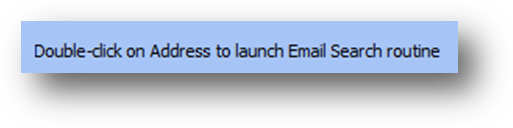
To see on what records and in what fields an email address is located, double-click on the email address in the grid to launch the Email Search routine.
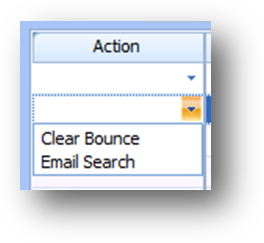
The Email Search routine can also be launched from the Action drop-down list.
Once the reason an email address was bounced has been resolved, to remove the delivery failure from Mailgun, and display in this routine, select Clear Bounce from the Action drop-down list.
Note: If the individual/firm needs to resolve the error on their end (ie..whitelist), wait until you have notified the individual/firm of the issue and they have notified you the issue has been resolved, before clearing the bounce.
Note: If the issue is that the email address does not exist, be sure to remove the email address from all fields Email Search shows that it is located in. Then clear the bounce.
Filtering
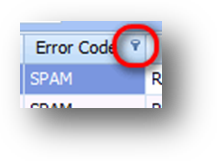
If a field can have column filtering applied, when you hover your mouse pointer over the field you will see a filter icon in the upper right corner.
Click on the filter icon and a filtering window will open.
The filtering window you see will depend on the type of field working with.

For non-date fields, on the Values tab, a list of check boxes for unique values in the field along with (All) Will be shown.
To filter for records that have a particular value, select the value from the list. If you check the box for multiple listings, records with any of the checked values will be shown.
In the example above, “SPAM” was selected from the Column Filter drop down list on Error Code. This limits the records already displayed in the grid, to those which have an error code of “SPAM”.

On the Text Filters tab, there is a comparison drop-down list (equals, does not equal, begins with, ends with, contains, does not contain, is blank, is not blank, and custom filter) and text field.
The above example, will limit the records already displayed in the grid, to those which end with the text entered in the Address field.
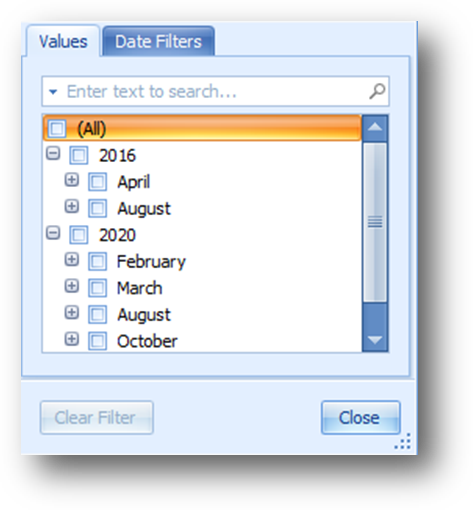
For date fields, on the Values tab, a list of check boxes for unique values in the field along with (All) Will be shown.
To filter for records that have a particular date, select the value from the list. If you check the box for multiple listings, records with any of the checked values will be shown.
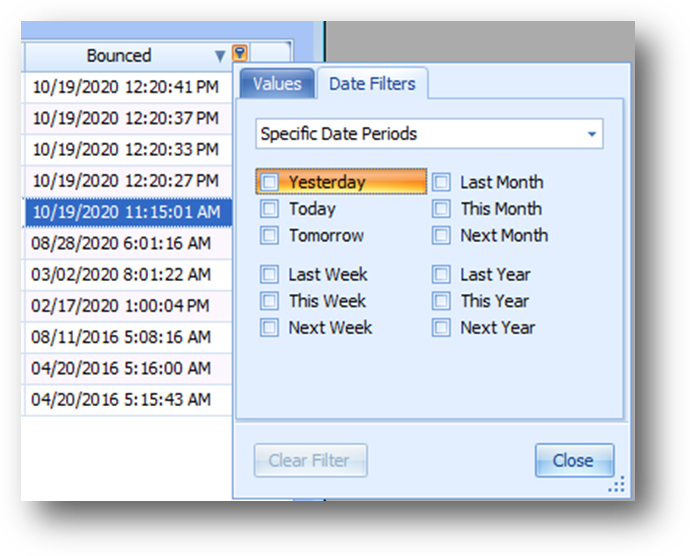
On the Date Filters tab, first select how to filter the dates from the drop-down list.
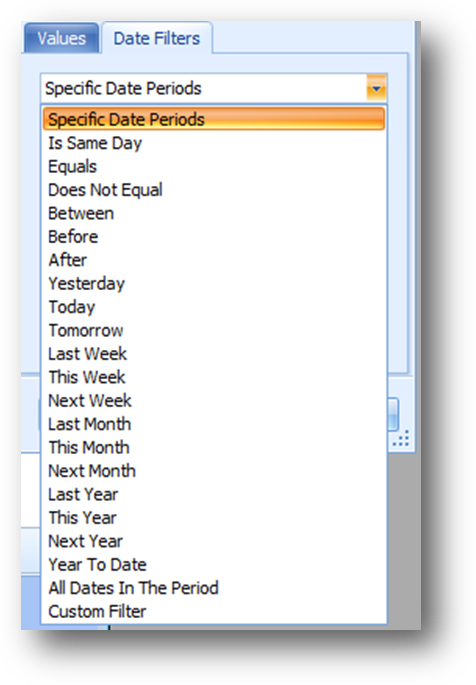
The filtering fields you see will depend on the filter type selected.
When a Column Filter has been applied to a field the filter icon is shown on the header when not hovering your mouse over the header.

To remove the filtering on a specific field, open the column filtering window and select Clear Filter.

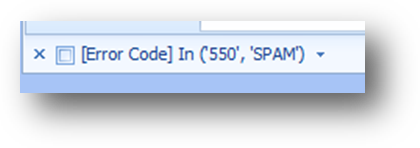
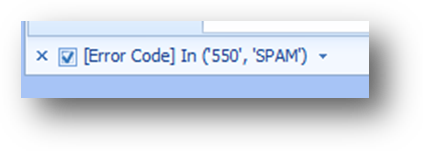
When a filter has been set, a filtering row is shown at the bottom of the grid and displays the current filter criteria.
In the example above, the filter criteria is Error Code = SPAM.

When the filter criteria is changed, previous filter criteria can be selected by clicking the down arrow to the right of the current filter criteria, or clicking on the filter criteria text.
To un-apply the current filter criteria, uncheck the box to the left of the current criteria text.
To apply the filter again, check the box.
To clear all filtering on the grid, click the ‘X’ in the far left of the filtering row.
This will both clear the current filtering and close the filtering row. The previous filter criteria history is not cleared. The next time you set a filter, the previous filter criteria will be shown again.
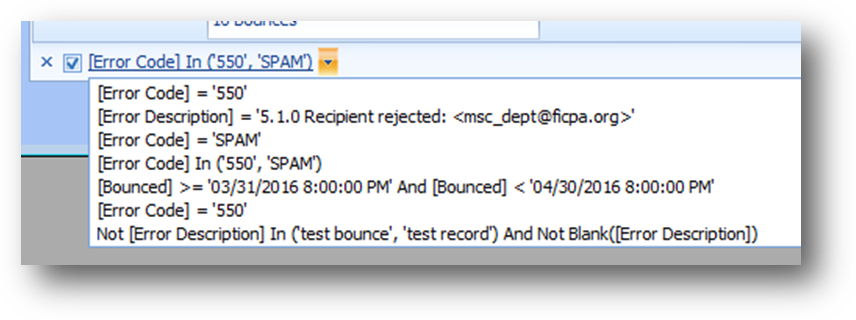
To remove a previous filter criteria from the list, first open the list of recent filters by clicking the down arrow to the right of the current filter criteria, or clicking on the filter criteria text.

Then highlight the previous filter to be removed. When highlighted, a red circle with an ‘X’ is shown at the far right of the listing. Click the red circle to delete the previous filter from the list. Note: the current filter can’t be removed this way.