Purpose: Imports a file of payment card transactions to a journal entry.
Note: Contact CDS support prior to running this routine for the first time. The program needs to be setup for each association according to the bank file that is being used. CDS will also need to know what g/l account to set as the offset account for these journal entries.
Launch Point: This routine can be launched from the following location(s):
•Utilities → Routines → General Ledger Journal Entries →
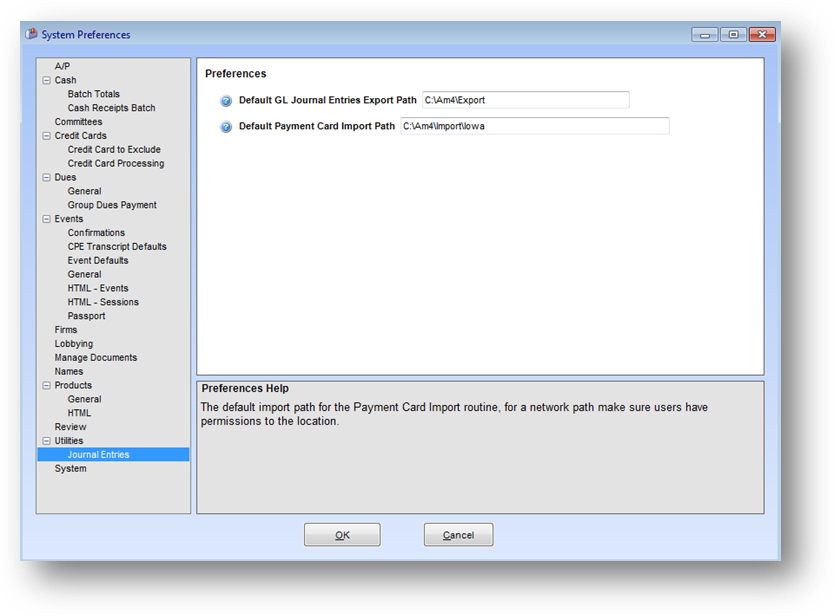
In System Preferences under Utilities – Journal Entries set the default path where the import files will be located in Default Payment Card Import Path. The path listed is where the Select File window will default to when the routine is launched.
Example: When the routine is launched a window will open
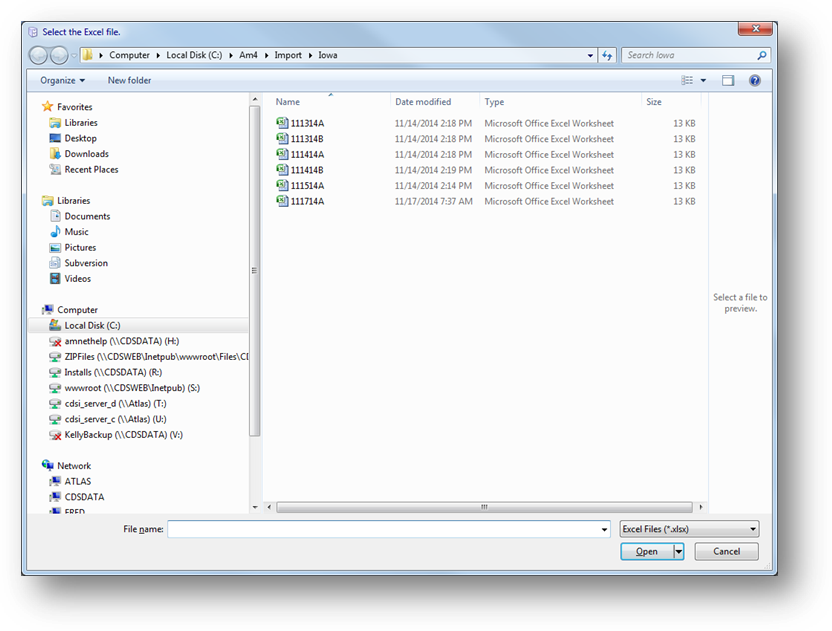
When the routine is launched a Select File window will open set to the default path set in system preferences.
Select the file to be imported.

If the default path is empty or it is not found, the above message is shown. Navigate to the file location and select the file.

The Payment Card Import window will open showing the imported transactions in the grid. All of the transactions in the provided file will be brought in as a debit and the sum of the transactions will be brought in as a credit using the offset g/l account provided to CDS.
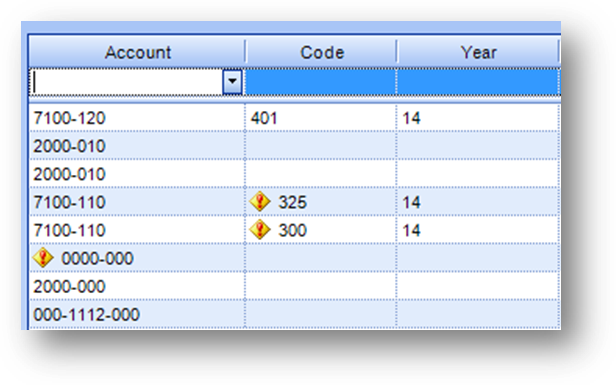
Validation icons will be shown in Account and/or Code if any data is invalid. Hover your mouse over the validation icon to see a tooltip explaining why the data is invalid.
A validation icon in Account is shown when the G/L account listed does not exist in the system or the field is empty.
A validation icon in Code is shown if the Account is a job costed account but there is no event listed, there is an event listed but the Account is not a job costed account, or if the event listed does not exist in the system.
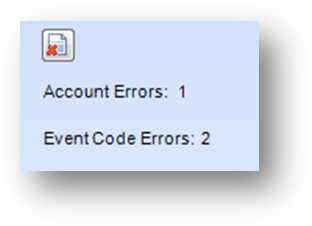
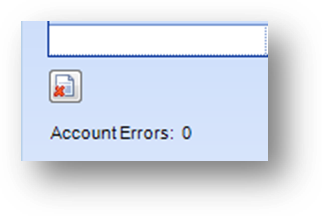
A count of errors is shown below the grid. All errors must be cleared before the journal entry can be posted.
To edit Account, either select the g/l account from the Account drop-down list and select the account from the list, or enter the number.
To edit Code the g/l account listed in Account must be a job costed account. Click in Code to open the event search window. Select the event and click OK.

To add line(s) to those imported use the new line row at the top of the grid. Note: When the cursor is in Description of the new line, hit Enter to add that row to the grid and be placed in Account in the top row for a new line.
Note: Once one line item has been added to those imported, and while the cursor is still in Account, you can use the F3 button to copy the g/l account from the last added line into the new line.
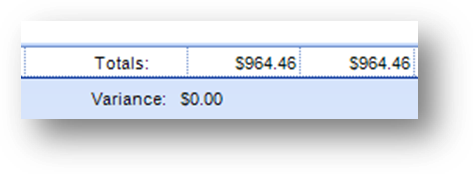
For the rows in the grid, a running total is shown at the bottom of the grid for the Debit and Credit columns.
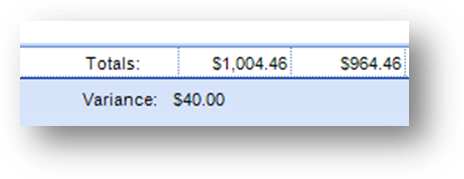
The variance between these two columns is also shown below the grid. You can only save a journal entry with a zero variance.
To delete a row in the grid highlight the row in the grid and click the delete button.
When you have finished the entry of the journal entry, click OK.

A recap message will be shown. Click OK to post the journal entry.
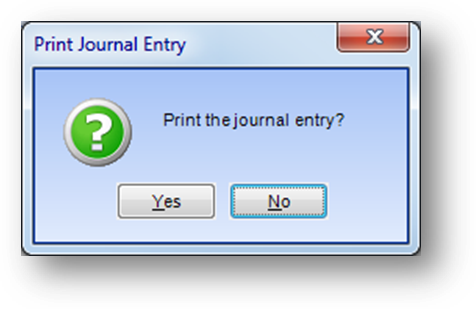
A message will open asking if you want to print the journal entry.
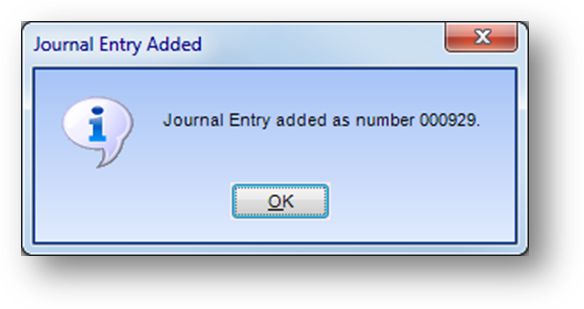
Next you will get a message showing you the journal entry
number assigned to the entry just added.