Purpose: To enter a product sale.
Launch Point: This routine can be launched from the following location(s):
•Names or Firms → File Maintenance → Routines Drop-Down Menu →
•Names or Firms → File Maintenance → Products Tab → Context Menu on Product Details Grid →
•Utilities → Routines → Cash Receipts → Cash Receipts Batch Entry → Product Payments →
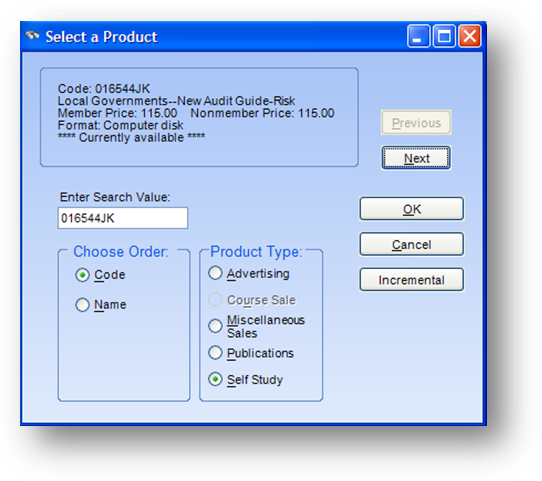
Example: When the routine is launched a window will open
Locate a product item for which you want to record a sale.
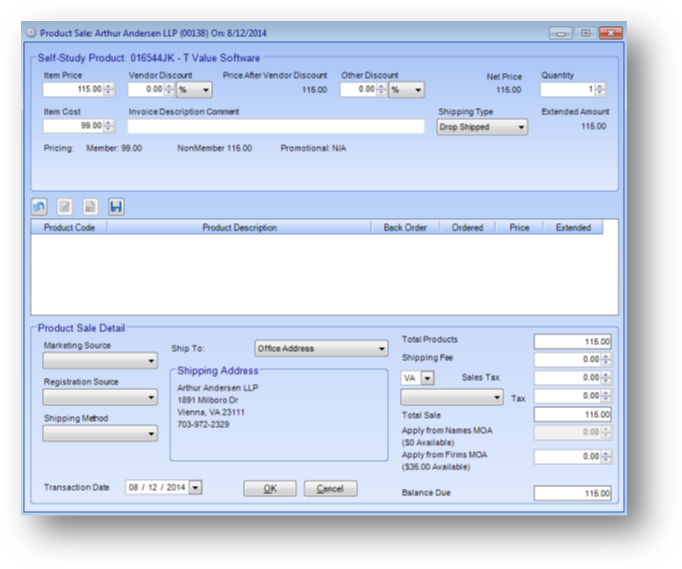
The Item Price and Shipping Type will be defaulted to the values in the product master file for the item. These fields can be modified on this sale if needed. Changing the values here will affect only this sale. The default values will remain unchanged.

Once all the information for the line item is entered click the Save icon above the grid to add the line to the sale.

Once the line item has been saved it will be shown in the grid. You can add additional line items to the sale by clicking the Add icon above the grid. If you add a line item by mistake you can delete it by highlighting the row in the grid and clicking the Delete icon above the grid.
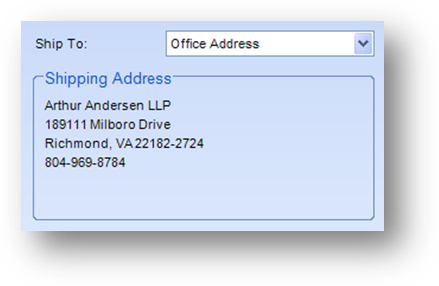
The Shipping Address is defaulted to the products address on the name/firm record. To change the address for this product sale, open the Ship To drop-down list and select from the other available addresses.
Complete filling out the Product Sale Detail section at the bottom of the window and click OK to post the product sale.
The next window that is seen will depend on your original launch point. If you launched the routine from the product payment window in a cash batch, you will be taken back to the product payment window.
If you launched the routine from any of the other launch points, the credit card payment window will open. This is done as a convenience for the user. If the person/firm will not be giving you a credit card number at this time, just cancel the credit card payment window. Remember that the product sale is already posted, so cancelling this window will not affect the sale.