Purpose: To add, edit, and view information about promotions and communications which are used in tracking various communications sent out to a group of individuals. The calendar view, allows you to view the promotion communications in the system in a calendar format.
Launch Point: This routine can be launched from the following location(s):
•Names → Routines → File Maintenance →
Example: When the routine is launched a window will open
Like most Add/Edit screens in the system, the Promotion Masterfile / Calendar Add/Edit screens are comprised of multiple pages. These pages are commonly referred to as “tabs” because of their similarity in appearance to file folder tabs.
The promotion window has four tabs Promotions, Promotion Details, Communications, and Filter described below.

Promotions
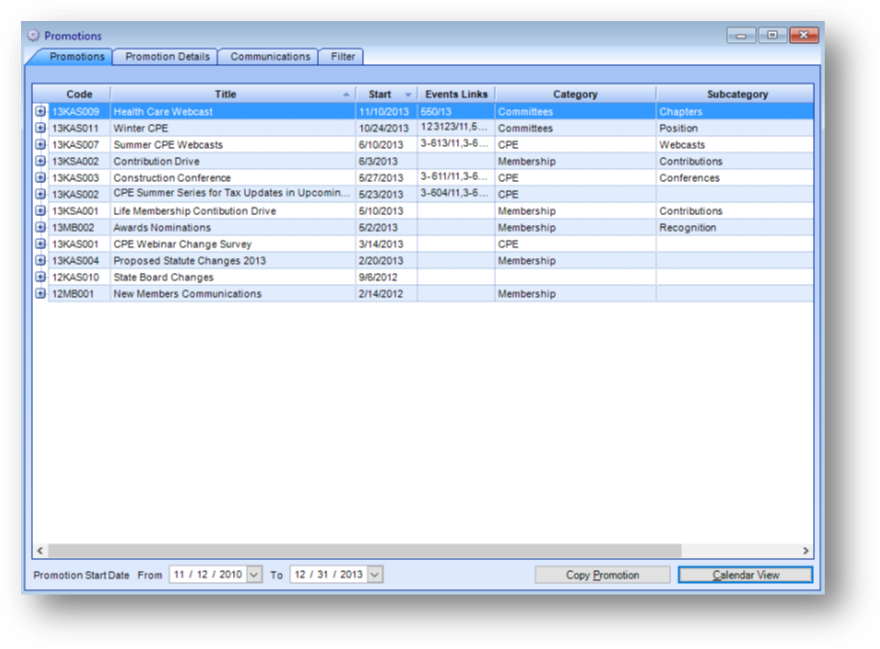
When launched the Promotions tab shows the promotions for the date range in the lower left of the window in the grid. By default, the last three years, with the most recent/future at top, are shown. Note: the default From date is set by a system parameter so if you want it to be something other than three years contact CDS support.

You can filter the records displayed, on the Promotions tab, by using the Promotion Start Date range. The records displayed will be updated as the date range is edited.
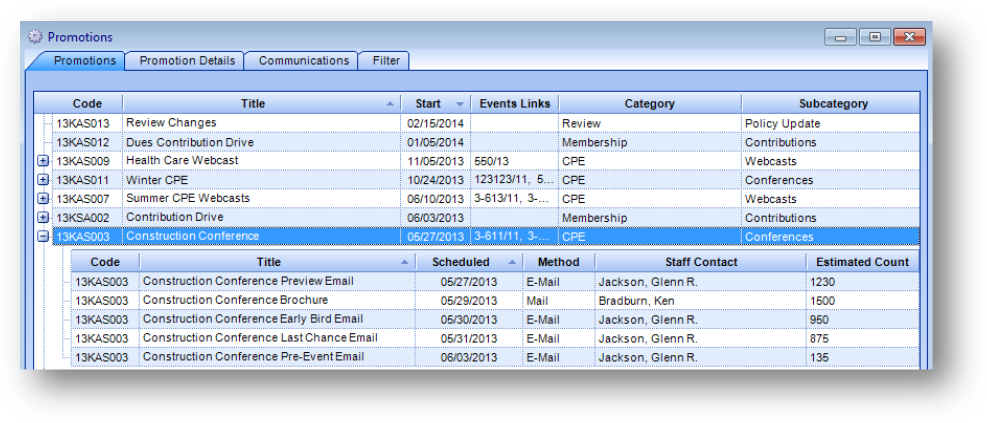
To see communications for a promotion, click on the plus sign to the left of the promotion row. Communications are shown as child rows of the promotion.

The Copy Promotion button will launch the Copy Promotion routine.
To see the communications in a calendar, click the Calendar View button in the lower right of the tab.
When changing from grid view to calendar view, if the parent promotion row is highlighted in the grid, the calendar will open to the date of the earliest communication for the highlighted promotion. If a specific communication is highlighted, when change from grid to calendar view, the calendar will open to the date of the highlighted communication.
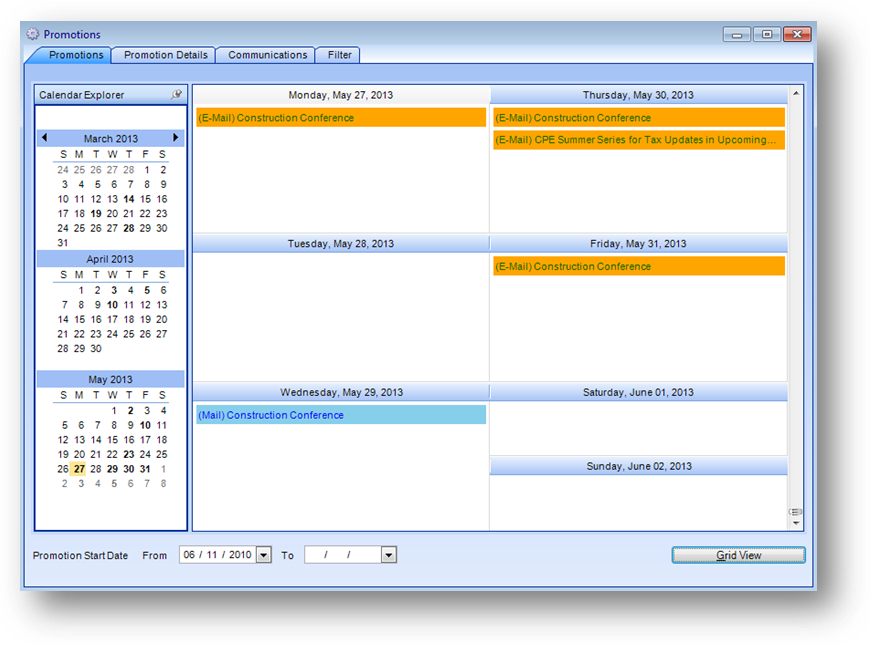
The calendar view shows communications on the date the communication is scheduled. The communication delivery method and promotion title are shown.
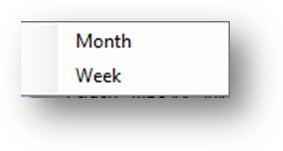
Right-click anywhere on the calendar to bring up a context menu of the view options which are Month or Week.
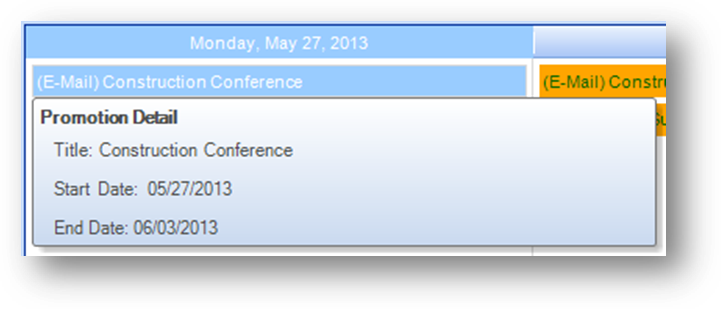
Left-click on a communication to show related promotion details.
From the calendar view, double-click a particular listing to be taken to the Communications tab for the promotion that communication belongs to. The communication selected in the calendar will be highlighted in the communications grid by default.
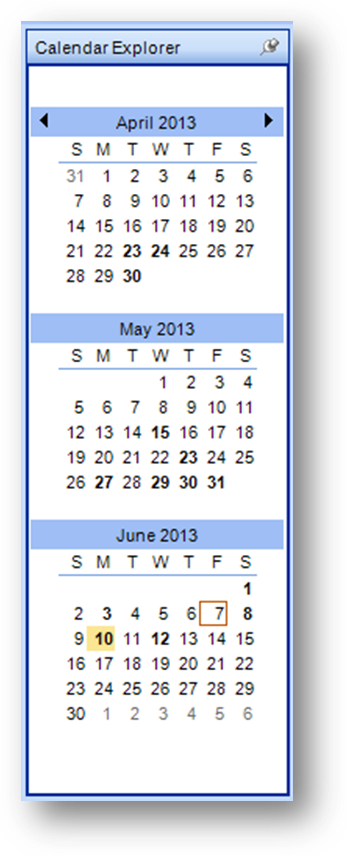
Note: The Calendar Explorer bar can be hidden by clicking on the push-pin icon.

When the Calendar Explorer bar is hidden, you can display the bar by hovering over it with your mouse. To anchor the bar in the window again, hover over the hidden bar to display, and click the push-pin icon again.
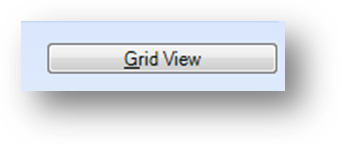
To return to the grid view on the Promotions tab, click the Grid View button in the lower right corner.
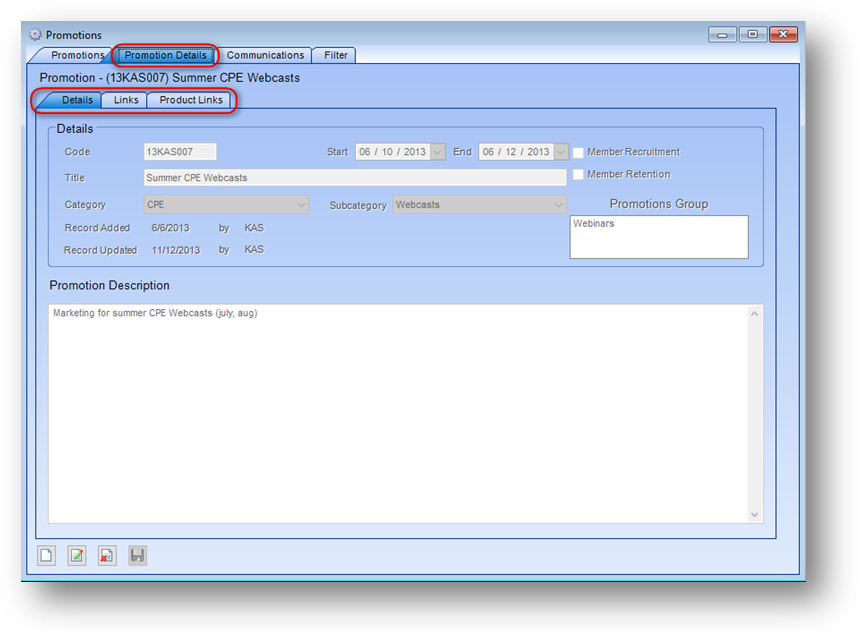
Promotion Details
The Promotion Details tab has three sub-tabs which display details for a promotion. To work with an existing promotion first go to the Promotions tab and highlight the promotion or one of its communications in the grid on the Promotions tab. Then go to the Promotion Details tab. The promotion code and title is shown above the sub-tabs.
The fields on the promotion details sub-tabs are controlled by the in-place buttons in the lower left of the Promotion Details tab.

If the grid on the Promotions tab is empty, the only button that will be enabled is the in-place Add button.
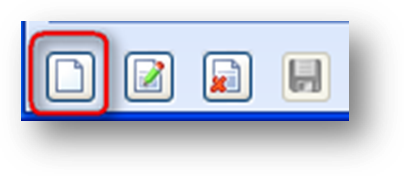
If there is at least one promotion shown in the grid on the Promotions tab, the in-place Add, Edit, and Delete buttons will be enabled. To add a new promotion record, click on the in-place Add button.
This will enable the fields on the three sub-tabs. Add the promotion information and click the in-place Save button.
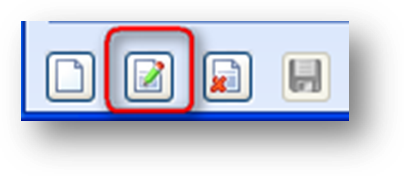
To edit a promotion, first highlight the desired promotion record in the grid on the Promotions tab, and then go to the Promotion Details tab. Then click the in-place Edit button. This will enable the fields on the three sub-tabs. Make changes as needed and click the in-place Save button.
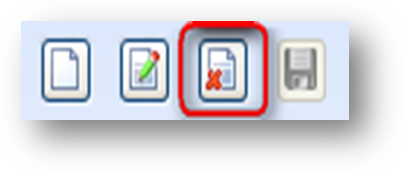
To delete a promotion record, first highlight the desired promotion record in the grid on the Promotions tab, and then go to the Promotion Details tab. Then click the in-place Delete button. You will be asked to confirm deletion in one of the following pop-up windows:
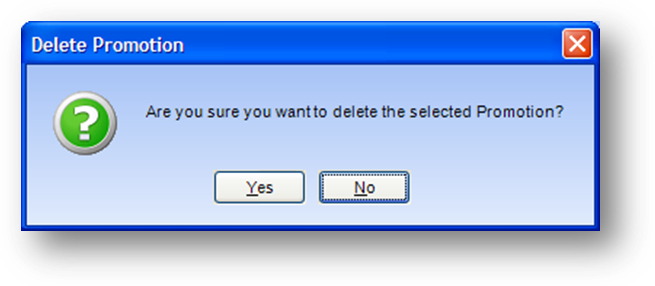
This message will be displayed if there are no communications set up for this promotion.
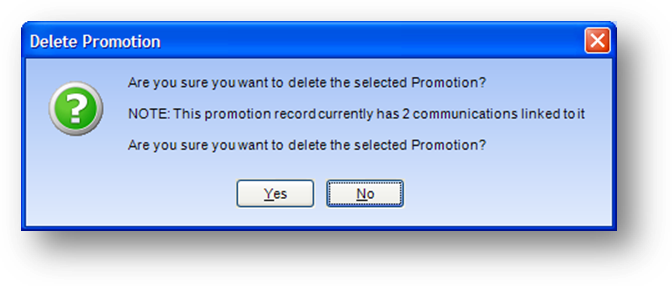
This message will be displayed if there is at least one communication set up for this promotion and none of the related communications have been recorded to any names records.
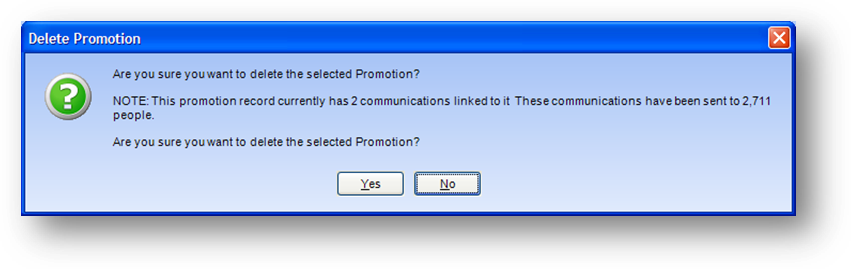
This message will be displayed if there is at least one communication set up for this promotion and at least one of the communications has been recorded to names records.
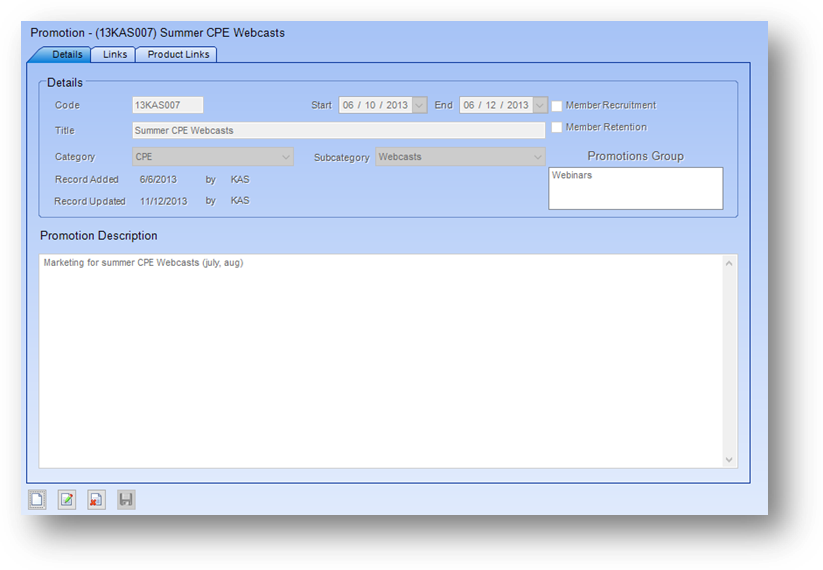
Details
Code: A unique system generated code that identifies each promotion. The code is composed of the last two digits of the year (calendar), the users initials and a 3-digit sequence number that increments as each new promotion is defined during the calendar year for each user (ie… 13MBR001, 13MBR002, 13KLM01).
Start: The date a promotion is scheduled to begin
End: The date a promotion is scheduled to end.
Title: A title that identifies the promotion.
Category: A broad grouping of promotions. The list in this field is user-defined.
Subcategory: A subset of the promotions category. The list in this field is user-defined.
Record Added / By: Date and user initials of when the promotion was originally entered into the system.
Record Updated / By: Most recent date and user initials of an update to the record.
Member Recruitment: If the promotion relates to member recruitment, check this box.
Member Retention: If the promotion relates to member retention, check this box.
Promotion Group: A user defined listing that allow for the grouping of similar kinds of promotions. The list in this field is user-defined. This information is strictly information
Promotion Description: A free form text field that can be used to fully describe the promotion.
Links
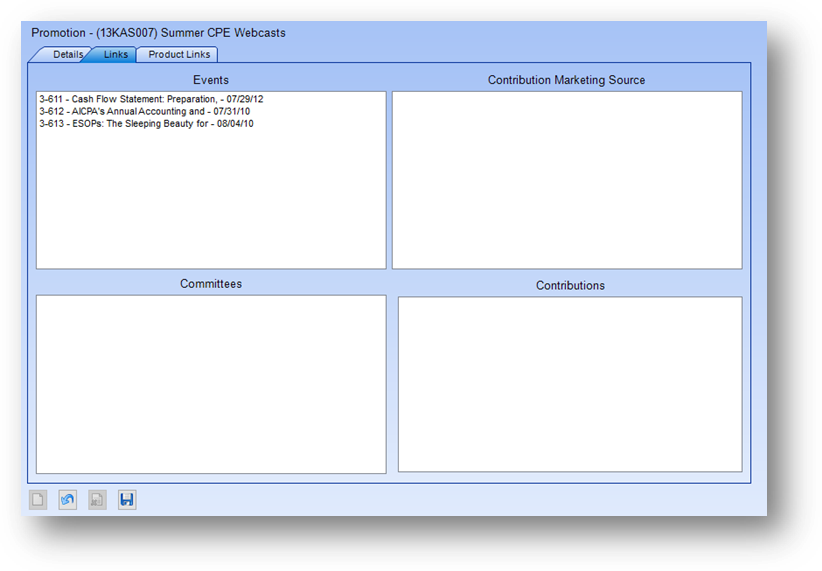
Events: One or more existing events in the system can be linked to the promotion. This information is strictly informational.
On the Select Events window link text for Import from Excel is shown above Move Item(s) button. Use the link text to import Event Code and Year from an excel spreadsheet. There are options to work with a spreadsheet with event code and year in one column or in separate columns.
Contribution Marketing Source: One or more dues contribution marketing sources can be linked to the promotion. The list in this field is user-defined. This information is strictly informational.
Committees: One or more existing committees in the system can be linked to the promotion. This information is strictly informational.
Contributions: One or more existing contributions in the system can be linked to the promotion. This information is strictly informational.
Product Links
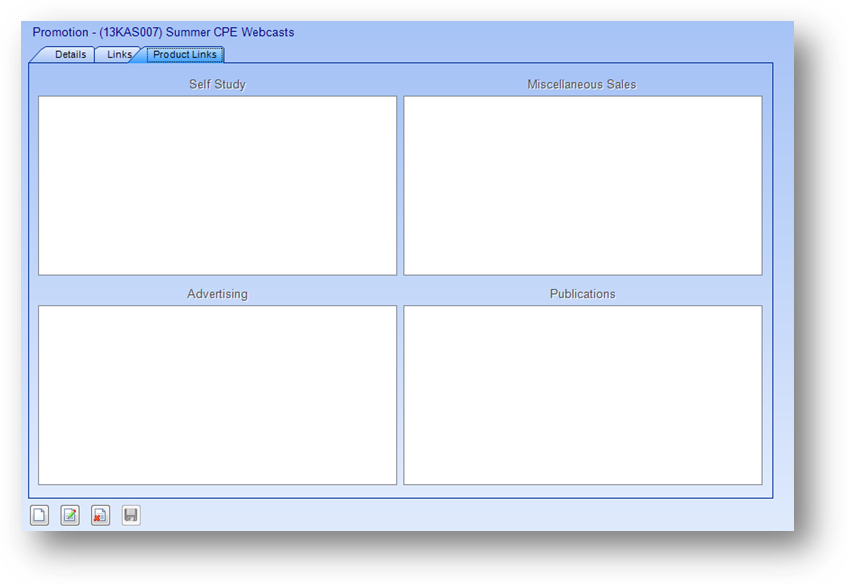
Self Study: One or more existing product self study items in the system can be linked to the promotion. This information is strictly informational.
Miscellaneous Sales: One or more existing product miscellaneous sales items in the system can be linked to the promotion. This information is strictly informational.
Advertising: One or more existing product advertising items in the system can be linked to the promotion. This information is strictly informational.
Publications: One or more existing product publications items in the system can be linked to the promotion. This information is strictly informational.
Communications
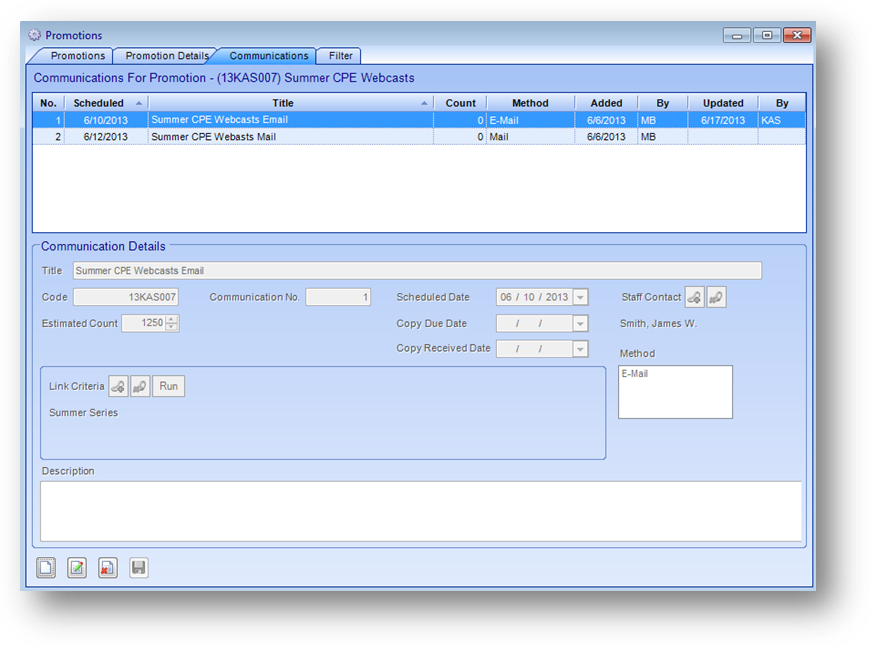
There is no limit to the number of communications that can be set up per promotion.
The Communications tab shows the communications linked to the promotion shown above the Communications grid. To display details for a specific communication, highlight it in the Communications grid.
The fields on this tab are controlled by the in-place buttons in the lower left of the tab.

If there have been no communications added yet for the promotion shown above the Communications grid, so the Communications grid is empty, the only button that will be enabled is the in-place Add button.
Once at least one communication has been added to the Communications grid, the in-place Add, Edit, and Delete buttons will be enabled. To add a new communication record for the promotion displayed above the Communications grid, click on the in-place Add button.
This will enable the fields on the tab. Add the communication information and click the in-place Save button.
To edit a communication, first highlight the desired communication in the Communications grid. Then click the in-place Edit button. This will enable the fields on the tab. Make changes as needed and click the in-place Save button.
To delete a communication record, first highlight the desired communication in the Communications grid. Then click the in-place Delete button. You will be asked to confirm deletion in one of the following pop-up windows:

This message will be displayed if the communication has not been recorded to any names records.
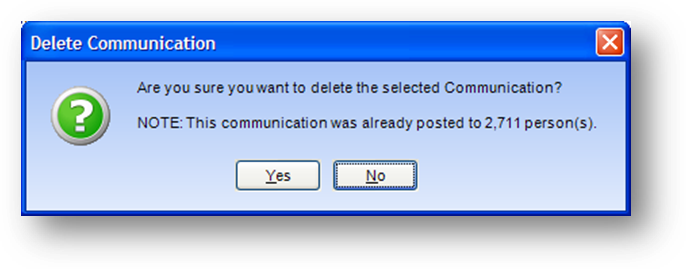
This message will be displayed if the communication has been recorded to names records.

Communication Details
Title: A title that identifies the communication.
Code: The promotion code that this communication is linked to.
Communication No.: A unique system generated number that identifies each communication in conjunction with its promotion code. The number is incremented for each successive communication that is defined for each promotion.
Scheduled Date: The date the communication is scheduled to be sent out.
Staff Contact: Link to Names File Maintenance showing the staff person responsible for the communication.
Estimated Count: The estimated count of people this communication will be sent to.
Copy Due Date: The date the copy for the communication is due, if applicable.
Copy Received Date: The date the copy for the communication is received, if applicable.
Link Criteria: A link to saved names criteria. When a criteria is selected the criteria name and description are shown. Note: the link is strictly informational. The Run button will run the linked criteria and allow the user to update the Estimated Count with the record count from running the criteria.
Method: The method used for the communication. The list in this field is user-defined.
Description: A free form text memo field that can be used to fully describe the communication.
Filter

The Filter tab is used to filter the records displayed on the Promotions tab, both in the grid and calendar views. Use any or all of the ten filter fields, as well as the promotion start date range, then click the Run (Re-extract data) button. The Promotions tab will be selected showing the records that meet the filter criteria.
Note: In User Preferences you can set the Added By filter to default to your name.
To clear the settings in all the filter fields, on the Filter tab, click the Clear button. To refresh the Promotions tab with the new filter settings, click the Run (Re-extract data) button.
Note: the clear button does not affect the promotion start from and to date fields.
Watch the Promotions video: