Purpose: To enter multiple registrations within one routine to the same event. Each registration will have the appropriate member or nonmember fees assigned. Only one payment can be entered for all the registrations.
Note: If the event is a bundle event, the registration in the bundle event will automatically register the person(s) in all future events in the bundle (shown on the Events File Maintenance Bundle tab).
Note: For bundle registrations there is a parameter that controls if the confirmation date, on the registrations entered for the events in the bundle, is populated at the time of the registration. The default setting is to not populate the confirmation date which is what happens for non-bundle registrations. Contact CDS support if you want the parameter set to populate the confirmation date so the registrations for the events in the bundle will not be recognized as new registrants. This parameter does not affect the bundle confirmation.
Launch Point: This routine can be launched from the following location(s):
•Firms → File Maintenance → Routines Drop-Down Menu →
•Utilities → Routines → Cash Receipts Batch Entry →
→ Click on Firm button to enter check from firm
→ Click down arrow on Event Payments button →
•Events → File Maintenance → Routines Drop-Down Menu →
•Events → File Maintenance → Registrations Tab → Context Menu on Registrations Grid →
Example: When the routine is launched a window will open
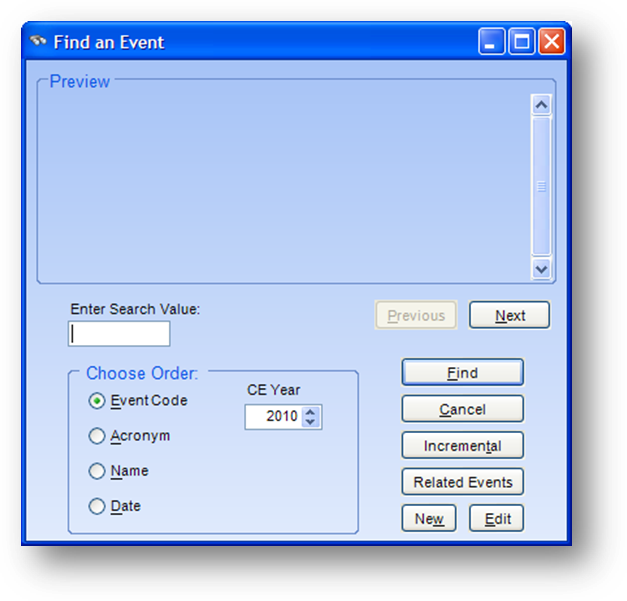
When the routine is launched from Firms file maintenance or Cash Receipts Batch Entry the event search window will be shown.
On the event search window select the event into which you want to register the people.

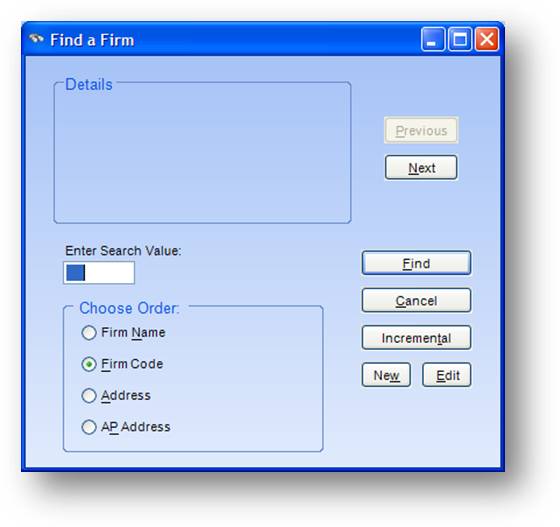
When the routine is launched from Events file maintenance the firm search window will be shown.
On the firm search window select the firm who will be paying for the registrants.
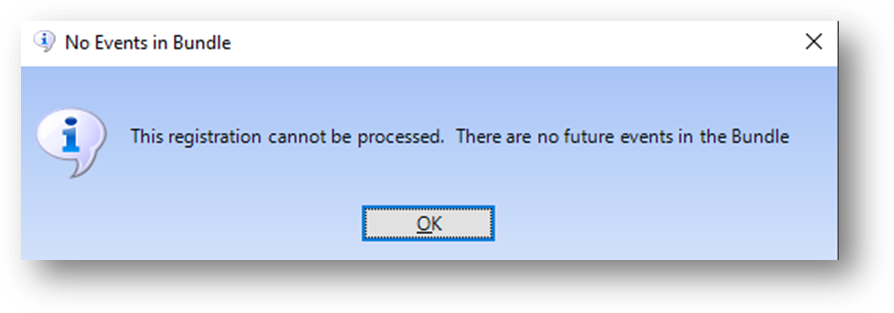
When a bundle event is selected, this message is shown if either there are no events on the Events File Maintenance Bundle tab or if none of the events on the Bundle tab have a begin date in the future.
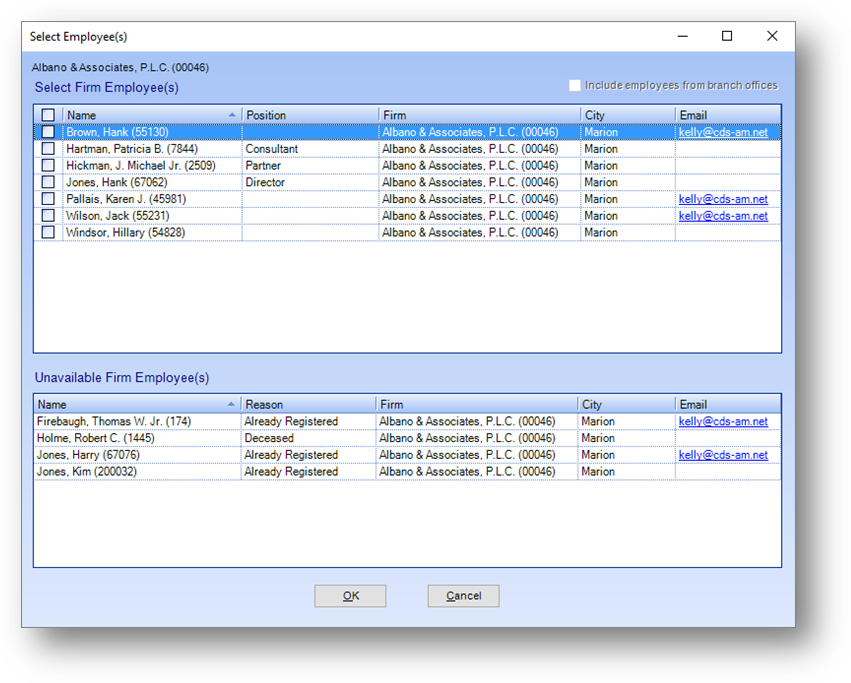
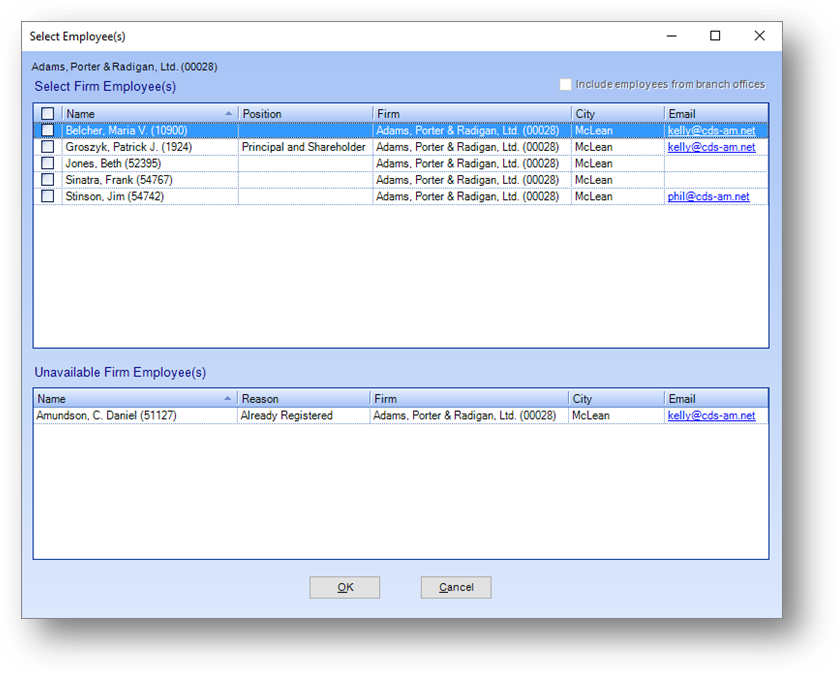
After the event and firm are selected the Select Employee(s) window will be opened on top of the Group Registration window (see below). The employees listed are linked to the Firm record that the routine was launched from or selected in the firm search on the launch of the routine.
The Select Employee(s) window has two grids. The Select Firm Employee(s) grid displays employees of the firm that are eligible to be registered into the event. The Unavailable Firm Employee(s) grid displays employees of the firm that are not eligible to be registered into the event. The Reason column shows why they are not eligible to be registered into the event.
Note: When a bundle event is selected the Unavailable Firm Employee(s) grid will show both those who are already registered in the bundle event or events in the bundle. Already Registered is shown in the Reason column for people who are already registered in the bundle event selected. Anyone already registered in any of the future events in the bundle have Already registered for: {events listed} in the Reason column.
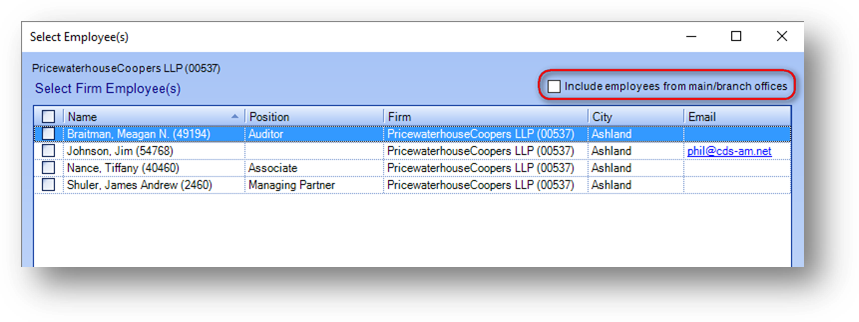
If the firm selected is a branch or main office, the Include employees from main/branch offices check box will be enabled.
If you want to register an individual from a branch or main office check the Include employees from main/branch offices check box.

Employees from all the branch/main offices will be added to the Select Employee(s) window.
To select an employee to be registered check the select box to the left of the employee name in the Select Firm Employee(s) grid. When all the employees to be registered have been selected click the OK button.
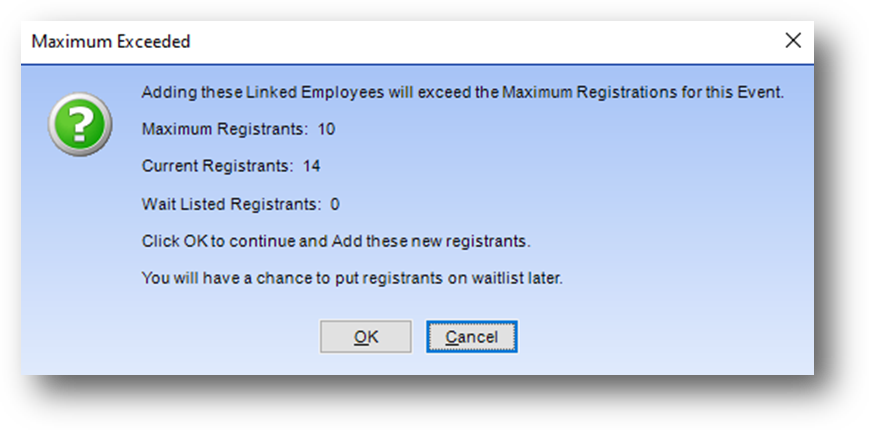
If the maximum registrants count has/will be exceeded, this message is shown.
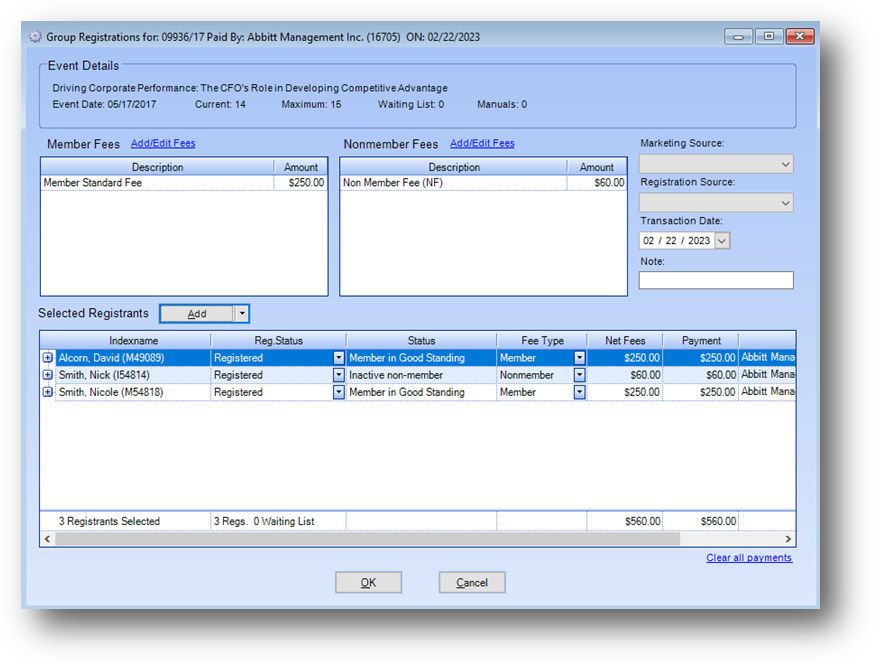
The employees will then be listed in the Selected Registrants grid on the Group Registration window.
Event Details

Name: The name of the event.
Event Date: Date the event starts. If this is a multi-day event then the day the event ends will also be shown.
Current: Count of active “registrants” in this event. It does not include any wait list, no shows, or cancelled registrations.
Maximum: Maximum number of registrants allowed for this event.
Waiting List: Number of registrants on wait list for this event.
Manuals: Number of course manuals that have been ordered for the event, based on data entered on the Materials tab. If your association does not track course manuals, the field would be irrelevant and would always show “0”.

Only select a Registration Source and/or Marketing Source or enter a Note if it is applicable to all registrants in the Selected Registrants grid.
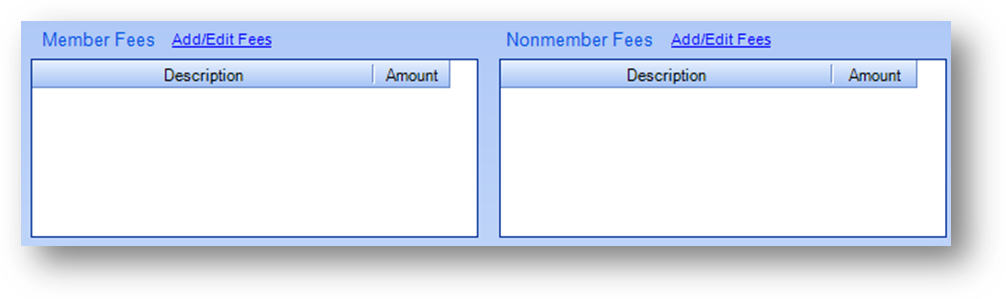
The Member Fees and Nonmember Fees grids show the selected fee(s) for the registrants.
To select the fees for members or nonmembers click the Add/Edit Fees link text above the appropriate fees grid.
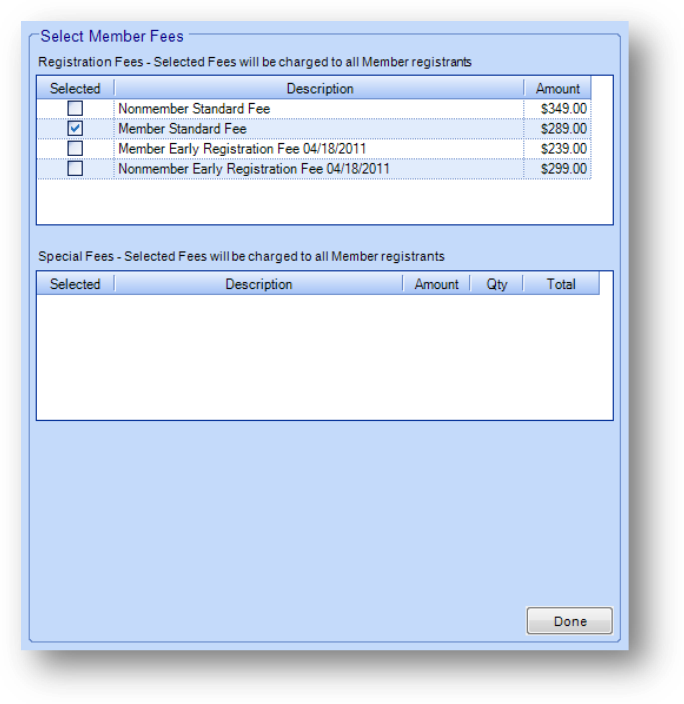
The Add/Edit Fees window is made up of three grids; Registration Fees, Special Fees, and Optional Fees. Each grid shows the available fees in that category for the event. The Optional Fees grid is only displayed if there are optional fees for the event.
Note: The fees in the Optional Fees grid are only applied to a registrant if the registrant meets the fee requirements.
In the Registration Fees grid you can only check the Selected box on one of the registration fees at a time. In the Special Fees grid and Optional Fees grid, you can multiply the number of times a fee is applied for the registrant, by changing the quantity (Qty). A registration can have as many special fees or optional fees applied as are required.
Once you have selected the fees to apply click the Done button. The selected fees will be shown in the related fees grid at the top of the window.
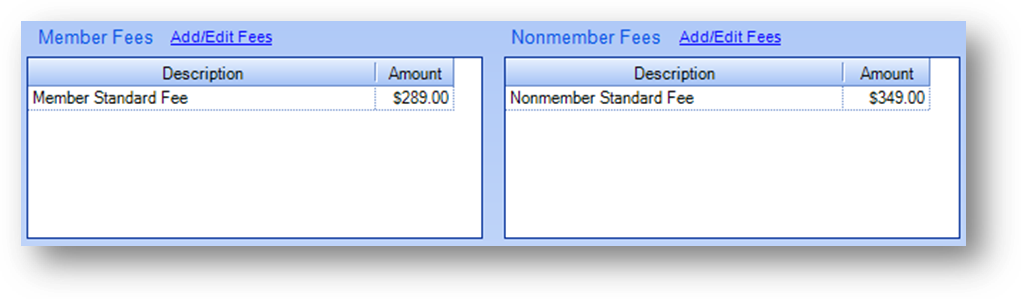
The above example shows what the fees grids would look like if there were only standard registration fees setup on the event.
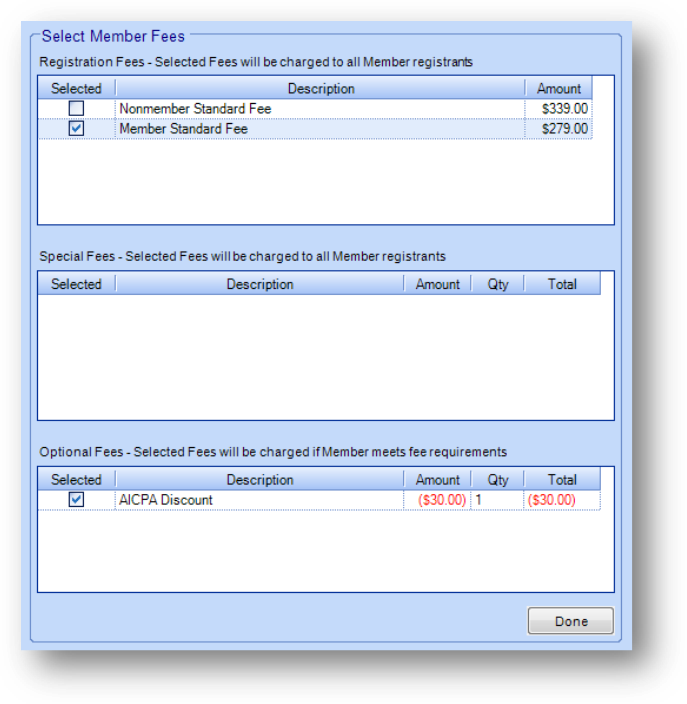
This example shows what the Select Members Fees window would look like if the event has both registration and optional fees.
Note: In the standard event registration routine an AICPA discount fee would be displayed in the special fees grid. In this routine it is shown in the optional fees grid because it cannot be applied to all registrants assigned the particular fee type. An AICPA discount fee has a requirement that the individuals Names record show they are a member of the AICPA.
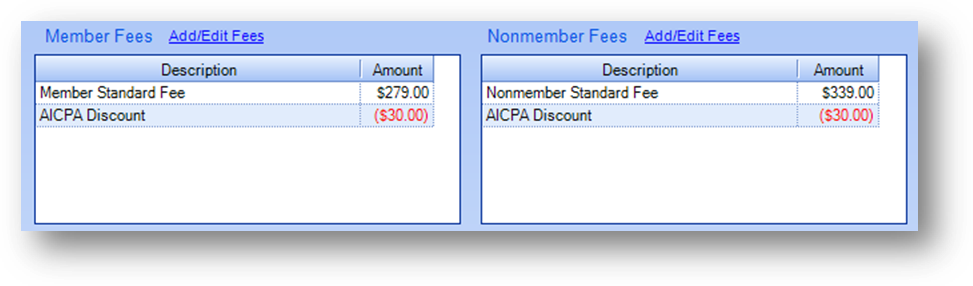
When you select the AICPA discount fee on the Select Members Fees window it is shown in the Member Fees grid even though it will not be applied to all members in the Selected Registrants grid.
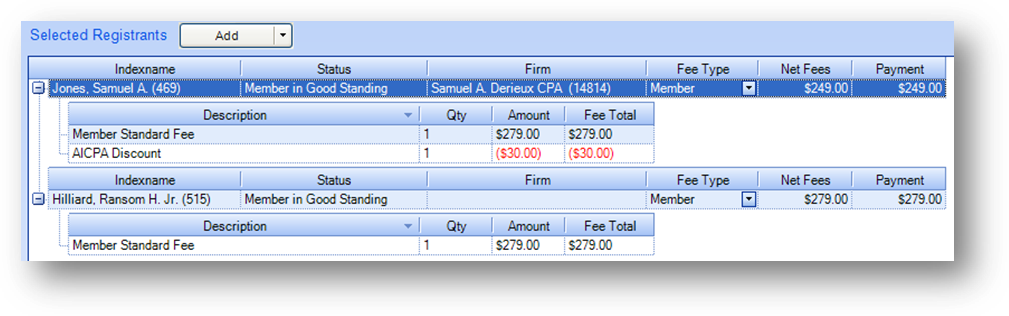
Both of these registrants have a fee type of member. Only one of them though has the AICPA discount fee applied because that Names record meets the requirement on the fee which is to be an AICPA member.
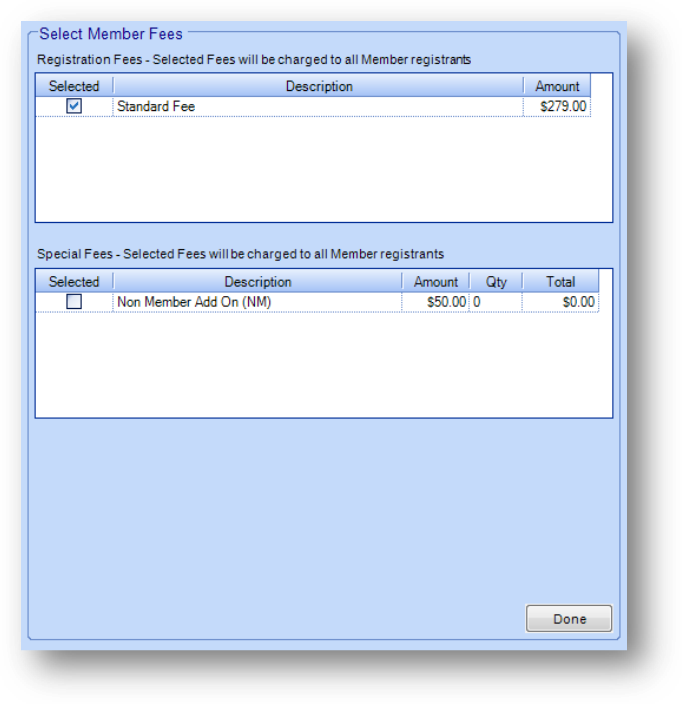
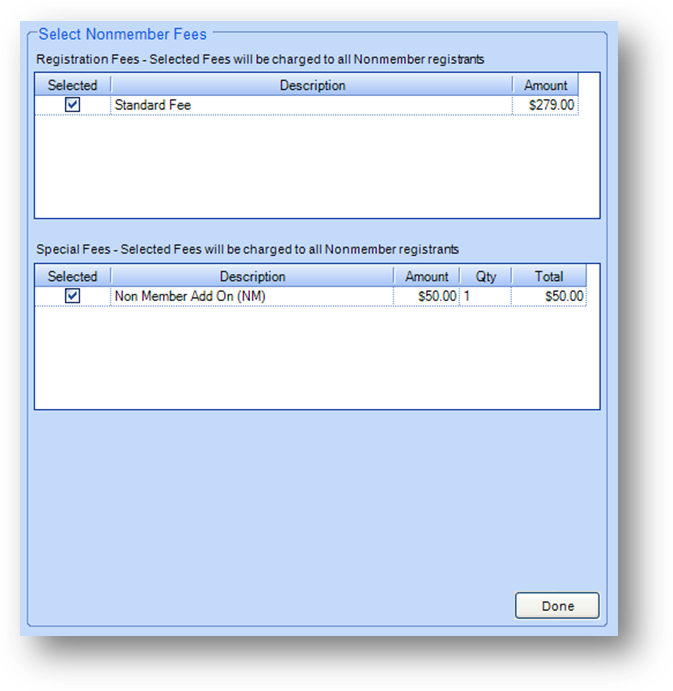
The above examples show what the Select Members Fees and Select Nonmember Fees windows would look like if the event has a standard registration fee (which applies to all) and a non member add on special fee.
The Select Members Fees window would display the standard fee in the registration fees grid. The Select Nonmembers Fees window would display the standard fee in the registration fees grid as well as the non member add on fee in the special fees grid.
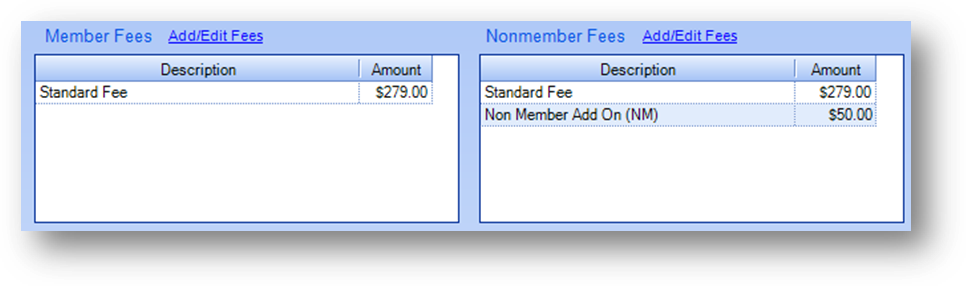
The Member Fees grid and Nonmember Fees grid reflect the fees selected for their respective fee type.
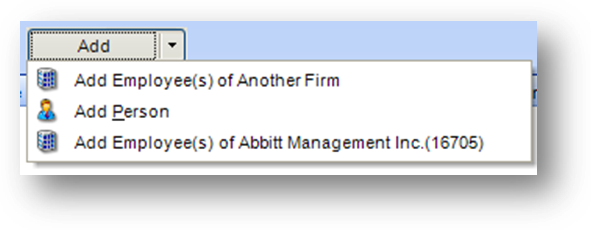
To select additional registrants, click the down arrow on the right of the Add button to open the drop-down menu. The options in the drop-down menu are Add Employee(s) of Another Firm, Add Person, and Add Employee(s) of {firm name routine was launched from or selected in the firm search on the launch of the routine} {(firm ID)}.
Select Add Employee(s) of Another Firm to select employees from a firm other than the firm the routine was launched from or selected in the firm search on the launch of the routine.
This will open the firm search screen. Locate the firm and click OK.
The Select Employee(s) screen will open allowing you to select which employees to register. The Select Employee(s) screen is made up of two grids.
The Select Firm Employee(s) grid displays employees of the firm that are eligible to be registered into the event. The Unavailable Firm Employee(s) grid displays employees of the firm that are not eligible to be registered into the event. The Reason column shows why they are not eligible to be registered into the event.
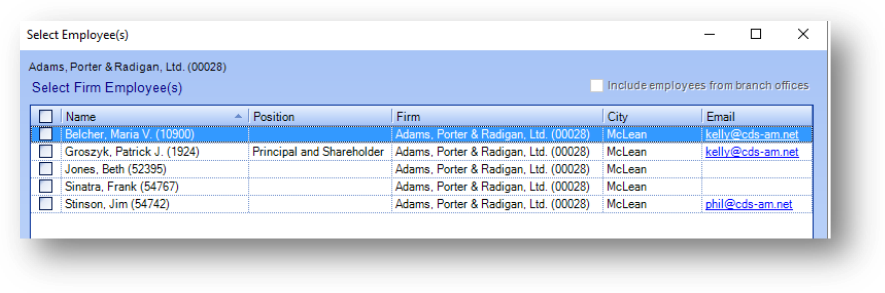
To select an employee to be registered check the select box to the left of the employee name. When all the employees to be registered have been selected click the OK button. The employees will then be listed in the Selected Registrants grid.
Select Add Person to select an individual names record.
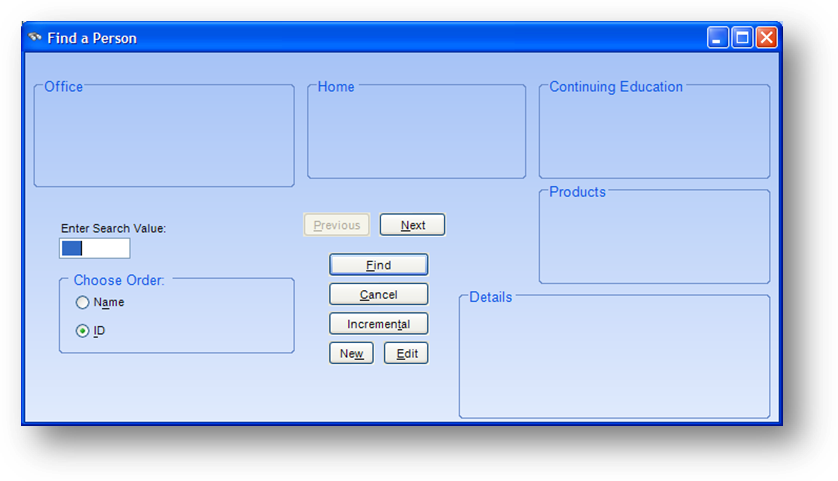
This will open the Find a Person window. Locate the person to register and click the OK button. The person will then be listed in the Selected Registrants grid.
Note: If a bundle event was selected this message is shown if the person is already registered in any of the future events in the bundle. Existing registrations in the events listed must be cancelled before the registration can be entered for the bundle event.
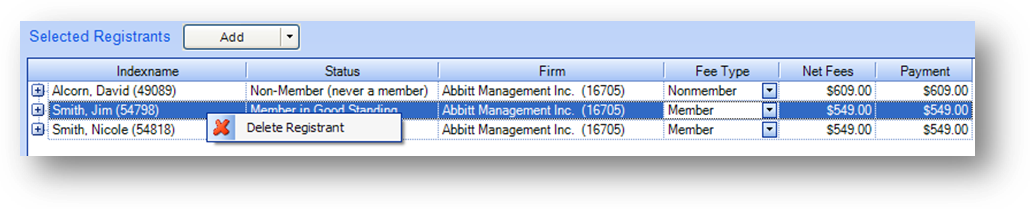
To delete a registrant already in the Selected Registrants grid highlight the row and right click to open the context menu. Click on Delete Registrant.
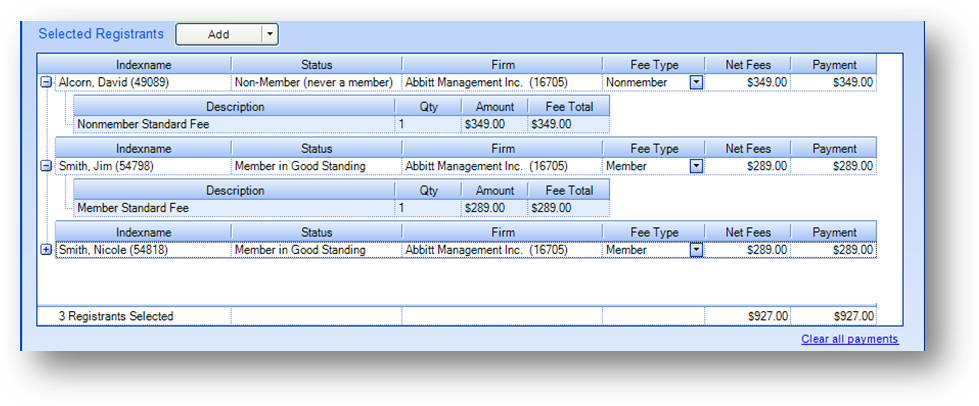
The Selected Registrants grid shows all persons who have been selected to be registered into the event.
The parent rows display a summary for each event registration. To see the fees applied to a specific registrant click on the plus sign to the left of the Indexname in the Selected Registrants grid. There is one child row for each fee.
Note: When the CPE sales tax functionality is turned on and the event has a tax rule selected, for registrants where a sales tax would apply will see “XX Sales Tax” fee listed in the child rows. The sales tax fee amount is updated as fees applied are changed. See CPE Sales Tax Function.
The Fee Type column shows if this registrant will have fees from the Member Fees or Nonmember Fees grid applied. If you wish to change the fees applied to a particular registrant, for example for an applicant whose fee type is Nonmember that you want to charge the member fee, click the down arrow to the right of the Fee Type and select Member. The fees in the Member Fees grid will then be applied to that registrant.
In the lower left hand corner of the Selected Registrants grid is the total number of registrants selected.
In the lower right hand corner are the total fees and total payment amounts for all registrants.
In the Selected Registrants grid the Net Fees is a read only field. It is automatically updated as either the selected Member Fees or Nonmember Fees are changed or the Fee Type is changed.
The Payment field is editable. It also is automatically updated as either the selected Member Fees or Nonmember Fees are changed or the Fee Type is changed. But if a particular registrant needs a different payment amount applied you can do so by typing in the appropriate payment amount.
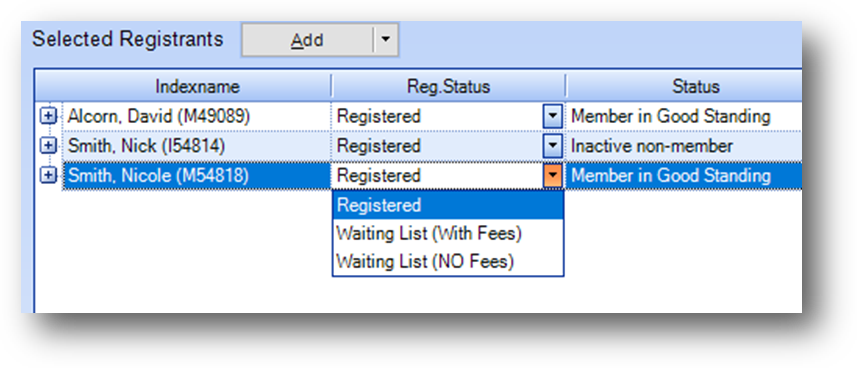
The Reg. Status is set to Registered when records are added to the Selected Registrants grid. To put a registrant on wait list select either Waiting List (With Fees) or Waiting List (NO Fees) from the Reg.Status drop-down list.

If the event has sessions a Sessions column will be shown in the Selected Registrants grid. The field will have link text to Add session registrations. Once session registrations have been added for a registrant the link text will be Edit.
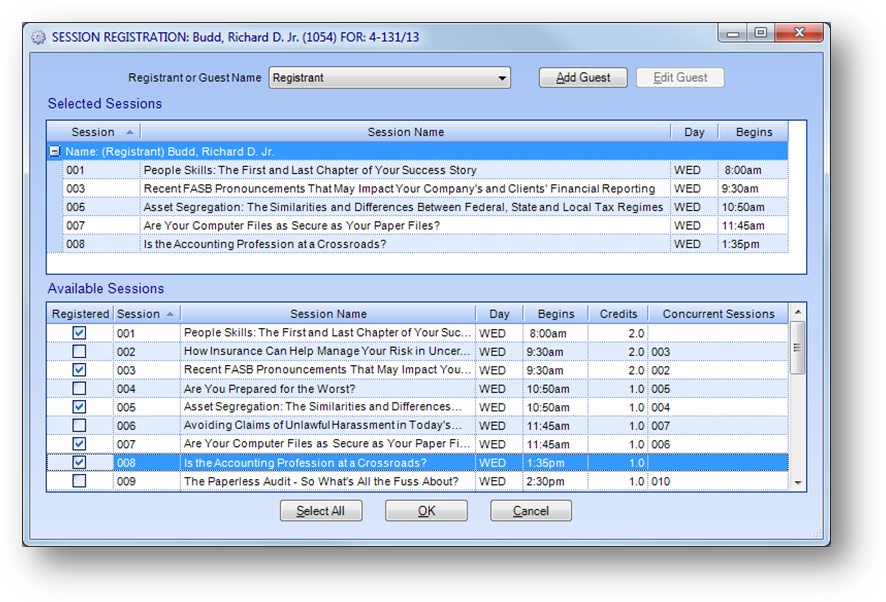
When either Add or Edit is selected the Session Registration window will open.
Session registrations for the registrant, as well as
guest(s), can be added or edited on the Session Registration
window.
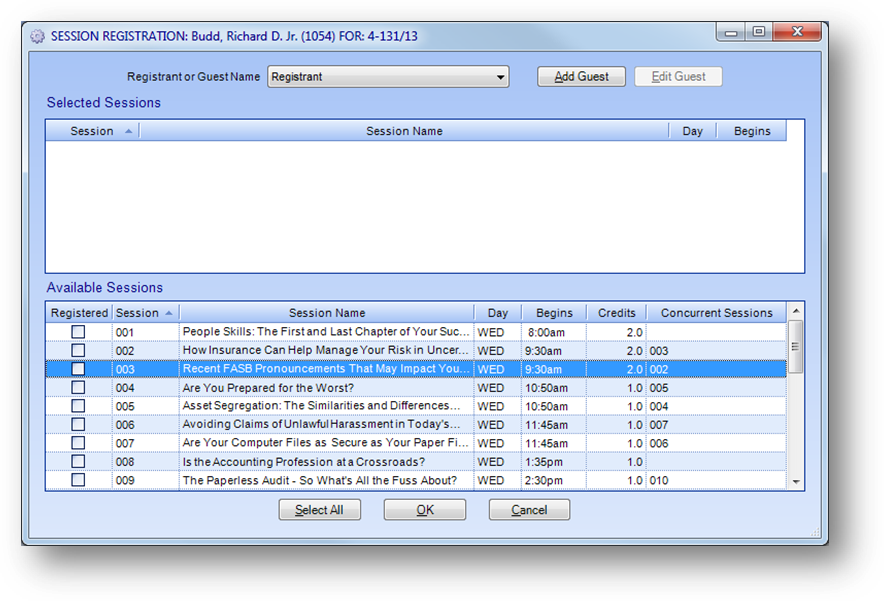
When the window opens, the information displayed will be for the registrant.
All available sessions for the event will be shown in the Available Sessions grid at the bottom of the window.
NOTE: General sessions, sessions that have been cancelled, and material related sessions will not be shown in the Available Sessions grid.
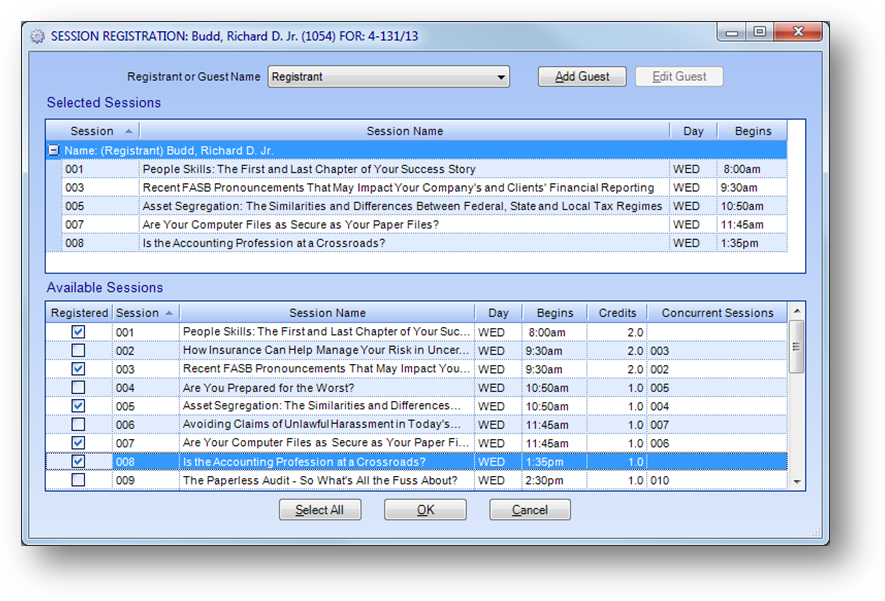
To add/edit the sessions for which the registrant wants to attend, check/uncheck the Registered box to the left of the session in the Available Sessions grid. Selected session(s) for the registrant will be shown in the Selected Sessions grid.
To add a guest, click the Add Guest button and the below window will open.
Note: A guest is someone who has no record in Names file maintenance and for whom you do not want to add a record. A common use of this is when a spouse wants to attend certain functions at the annual leadership conference. The registrant under whom the guest is entered has the financial liability for any charges associated with the guest registration.
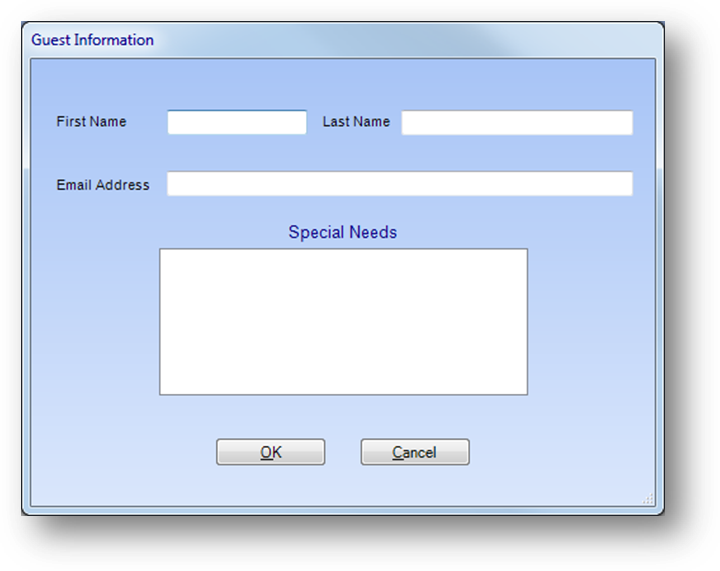
Enter the guests name, Last Name is required, and click OK.
Note: If you want the Email Address to be required on a guest go to File – System Preferences|window=proc;topic=System Preferences. Navigate to Events – General. Check the box for Require email for session guests.
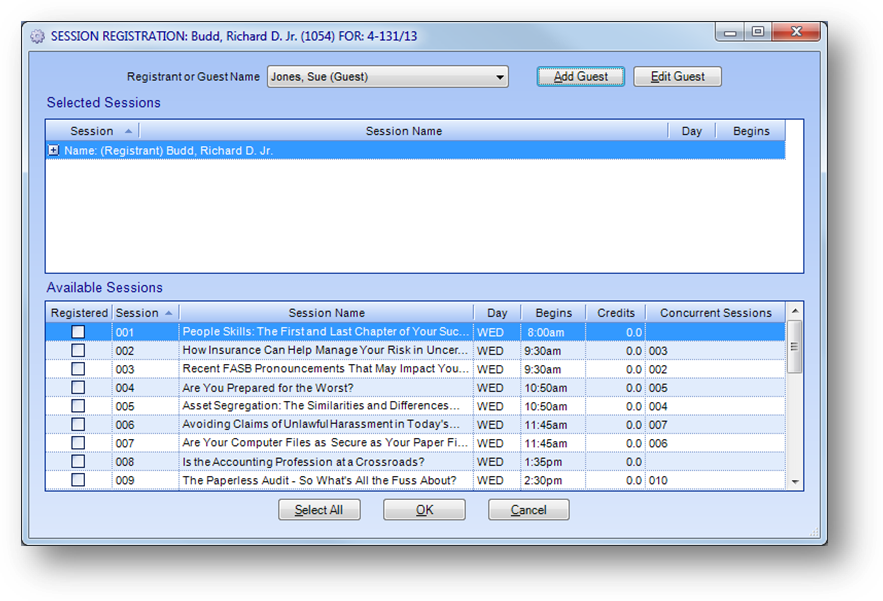
The guest’s name will be displayed in the Registrant or Guest Name field with “(Guest)” at the end. Add/edit session registrations for the guest in the same way you did for the registrant.
Note: The Edit Guest button allows you to re-open the guest information screen for the guest currently displayed in the Registrant or Guest Name field.
When all the session registrations to be added/edited are complete, click the OK button to add the session registrations.
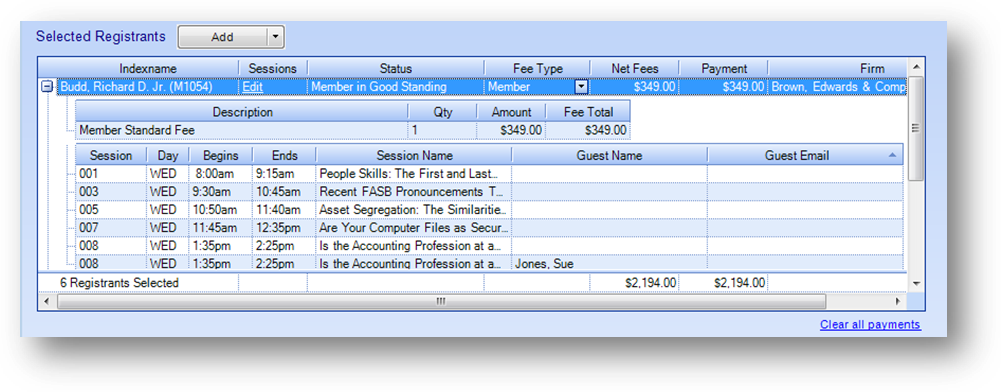
After sessions have been selected click on the plus sign to the left of the row in the Selected Registrants grid to see the child rows for the sessions selected.
Note: If you have your system set to work with session fees (see Post fees on session registrations in the Events General area of System Preferences|window=proc;topic=System Preferences) there will be an additional Fee column in the grids on the Session Registration window.

After sessions with fees have been selected click on the plus sign to the left of the row in the Selected Registrants grid to see the child rows for the session fee.
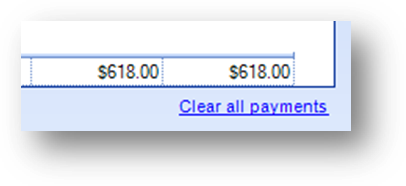
If you wish to clear the payments on all the registrants you can click the Clear all payments link text under the right side of the Selected Registrants grid. This will set all the Payment fields to zero. The text will then read Pay in full. Clicking the Pay in full link text will set the payment amount on all registrants to the current net fees amount on the registrant.
Once the registration window has been completed, click the OK button.
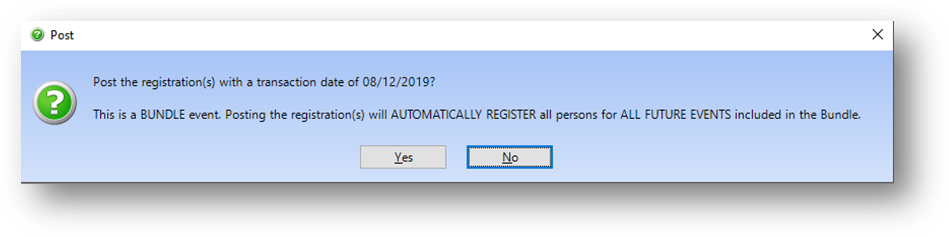
Note: If a bundle event was selected the post message shows that the registration(s) are for a bundle event and that if you proceed each person will be registered into all future events in the bundle.
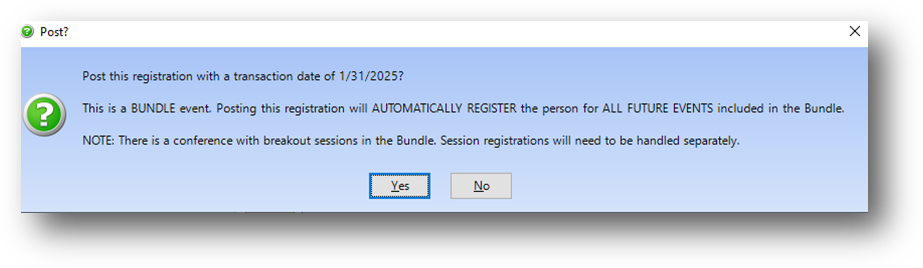
A third line of text is shown in the post message noting session registrations must be handled separately if any event in the Bundle has Sessions set to Yes, on the Events Name tab, and any session, in those events, are breakout session (General Sessions? box is un-checked on the Name sub-tab of the Events Sessions tab).
To post the registration in the bundle event as well as future events in the bundle, click Yes.
At this point the event registration is posted.
NOTE: If a bundle event was selected part of posting the registrations for the events in the bundle is entering transfers from the bundle event to the events in the bundle. The amount transferred is determined by looking at the credit hours in the events in the bundle and the total fees for the bundle event. Example: If total fees for the bundle event is $600 and there are two events in the bundle. The first is worth 8 hours and the second is worth 4 hours. The first event would have $400 transferred and the second $200.
If you launched the routine from Firms file maintenance or Events file maintenance the credit card payment window will open. This is done as a convenience for the user. If the firm will not be giving you a credit card number at this time just cancel the credit card payment window. Remember that the event registrations are already posted, so cancelling this window will not affect the registrations.
Note: The credit card payment window will show payor information for the firm the routine was launched from or selected in the firm search on the launch of the routine. Even though on the group registration window you are allowed to enter individuals from another firm as well as individuals, the payment can only be from the firm you launched the routine from or selected in the firm search on the launch of the routine.
Note: If a bundle event was selected no matter what or how many fees were selected for the registrant(s) in the bundle event, the registrations into the events in the bundle ONLY have one bundle fee entered with an amount matching the transfer amount described above.

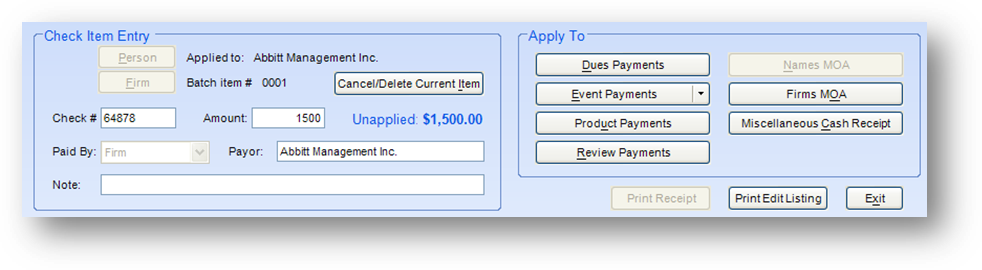
If you are launching the routine from Cash Receipts Batch Entry, first enter the firm check. When a firm check is entered an arrow will be displayed on the Event Payments button.
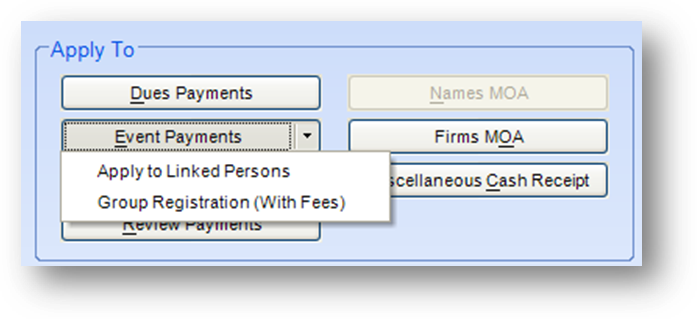
Click on the down arrow to the right of the Event Payments button to open a listing of options. The listings are Apply to Linked Persons and Group Registration (With Fees). Selecting Apply to Linked Persons allows you to enter an event payment for an employee of the firm.
If you select Group Registration (With Fees) then the Group Registration (With Fees) routine will be launched.
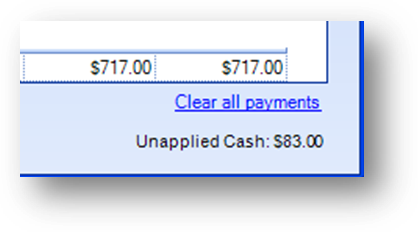
When the Group Registration (With Fees) routine is launched from the Cash Receipts Batch Entry routine the Unapplied Cash amount from the check will be shown in the lower right corner of the window.
Note: If the unapplied amount from the check is less than the total fees on the registrants, in the Selected Registrants grid, the Payment column will only be filled in up to the unapplied amount from the check. That means that some registrations could be partially paid or not paid at all.
If your association tracks registrant’s material option for event materials, this routine has functionality to enter that information. There is some system setup that needs to be done by CDS first.
Note: If a bundle event was selected no and your association tracks registrant’s material option for event materials, keep in mind though that for bundle events, any material related fee/session will not be included on the registrations entered for the events in the bundle.
If you track registrant’s material option and you do not see a Materials field in the Selected Registrants grid when working with an event that has the appropriate material data setup, contact CDS to have your system setup. We need to know if your association uses fees or sessions and what fee or session codes are used for materials for the materials functionality to work correctly.
Once CDS has your system setup, go to File – System Preferences to set the default material option to use.

In the left pane, select Events – General. The Default materials setting preference allows you to specify the default option used in the Materials field.

Once your system has been setup to use the materials functionality, the Materials field will be dispalyed in the Selected Registrants grid for events that have the appropriate material data setup on them. When the routine is launched, Materials will default to the option set in the Default materials setting parameter.
For any registrants who do not want the default material option, change the option by clicking the down arrow to the right of Materials and selecting the appropriate material option.

If the Default materials setting parameter is set to Electronic, when the routine is launched the link text under the left side of the Selected Registrants grid will be All materials printed. Clicking the All materials printed link text will set Materials to Printed on all the registrants. The text will then read All materials electronic.
Note: If your association uses fees to track materials, those fees will be hidden from display in the Member Fees and Nonmember Fees grids as well as the Add/Edit fees windows.
A child journal row will be shown in the Selected Registrants grid for all registrants if you track materials with fees.
Note: If your association uses sessions to track materials and your system is setup to charge fees for sessions, and there is a fee amount associated with the material session, there will be a child journal row shown in the Selected Registrants grid for those registrants who will be charged for their material option.
Note: The routine only looks at the session fee in the Standard or Member Fee field on the sessions name tab.
Watch the Group Registrations (With Fees) video:
See also